Overview
A FlexiFunnels sub-user is a person or organization, such as a contractor, subcontractor, grantee, or subgrantee, who is granted access to your FlexiFunnels account by the Account Owner. A sub-user is not part of the Authorized User's workforce.
Use sub-user access to delegate work while maintaining control over the areas of your account that each person can view, edit, or create. Permissions can be configured for products, projects, and integrations.
Before You Begin
- Confirm that you can sign in to the FlexiFunnels account where the sub-user will be added.
- Ensure that you have access to Manage Sub Users.
- Have a valid email address for the person who will receive the sub-user invitation.
- Decide which projects, products, funnels, reports, and settings the sub-user needs to access.
Video Tutorial
Step 1: Open the Sub-User Management Area
Sign in to your FlexiFunnels account at https://app.flexifunnels.com/login. From your account menu, select your account name and then click Manage Sub Users. This opens the area where you can add and manage access for account collaborators.

Step 2: Add a Sub-User
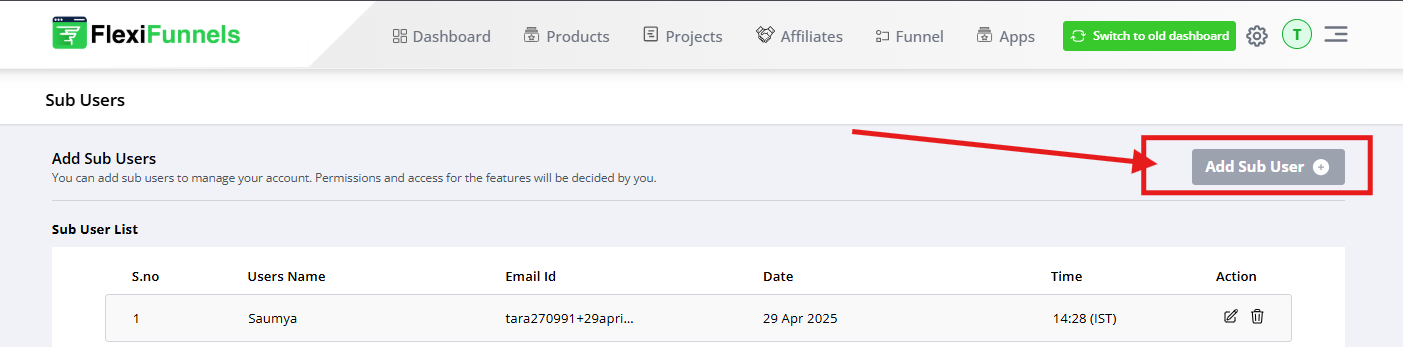
Click +Add Sub User to begin creating a new sub-user profile. This action prepares an invitation for the person who needs access to your account.
Step 3: Enter the Sub-User Email Address
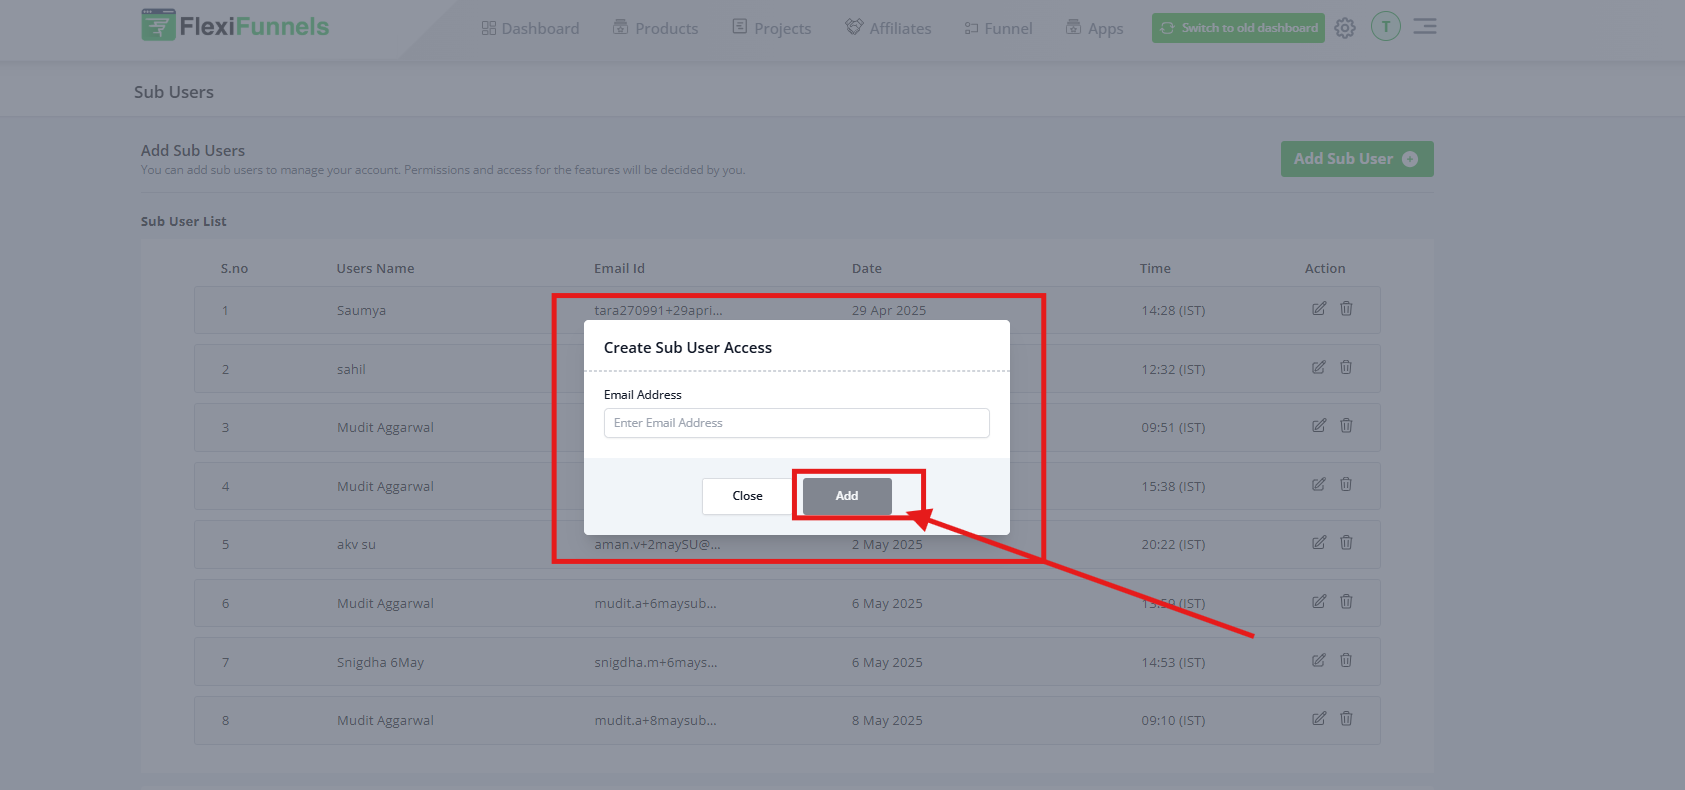
Enter the email address for the person who should receive sub-user access. FlexiFunnels uses this address to send the access invitation.
Step 4: Open Access Details
Click Edit Access Details for the added sub-user. This opens the permission controls that determine what the sub-user can view, edit, and create in your account.

Step 5: Review the Permission Categories
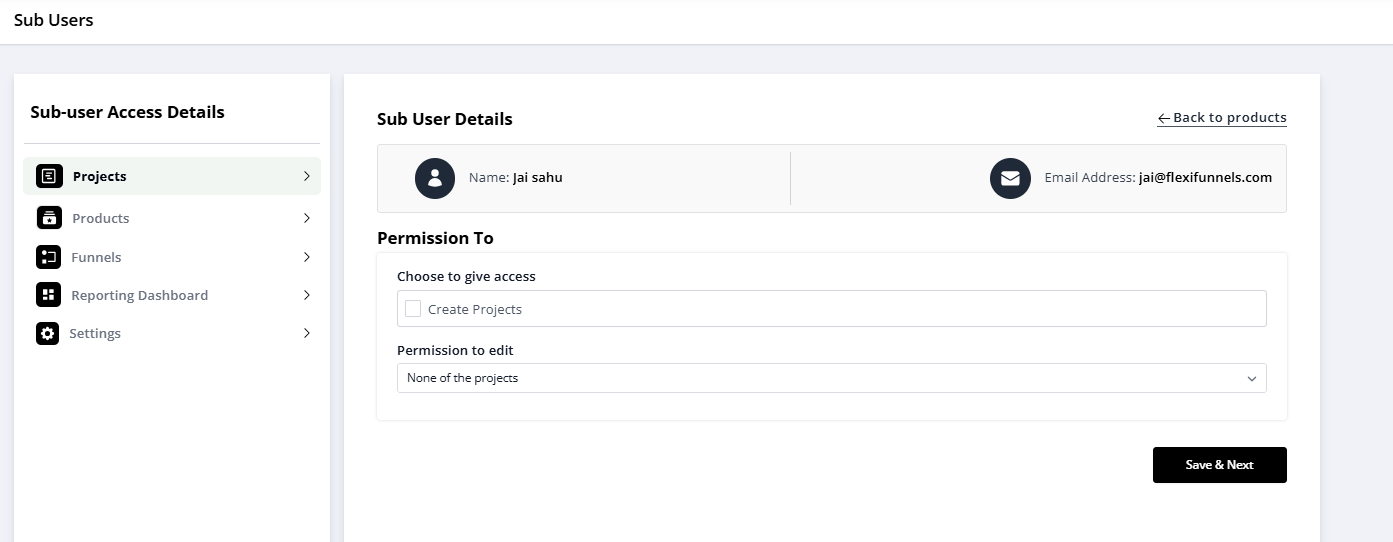
After you click Edit Access Details, FlexiFunnels displays the available permission categories. Use the options on the left to configure access only for the features the sub-user needs to perform their work.
Step 6: Configure Project Permissions
Use the Projects settings to control whether the sub-user can create projects and which existing projects they can edit.
- Create Projects: Select this option when the sub-user should be able to add new projects.
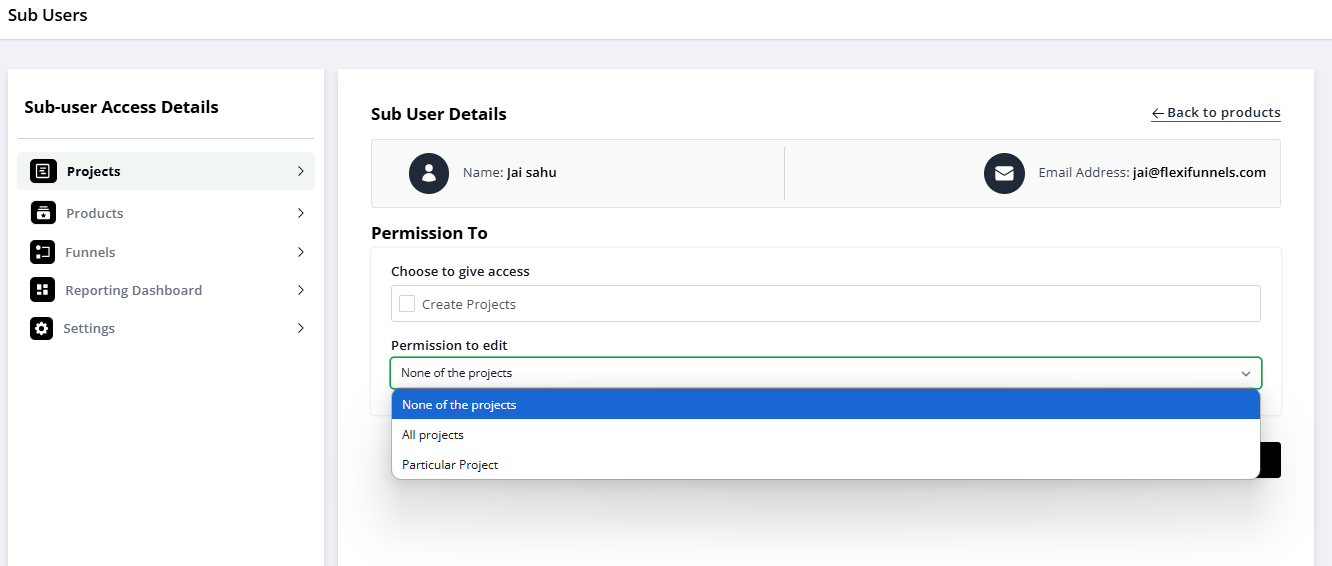
- Permission to Edit: Choose whether the sub-user can edit no projects, all projects, or only selected projects.
When you select individual projects, the sub-user can edit only the projects selected in the checkbox list.
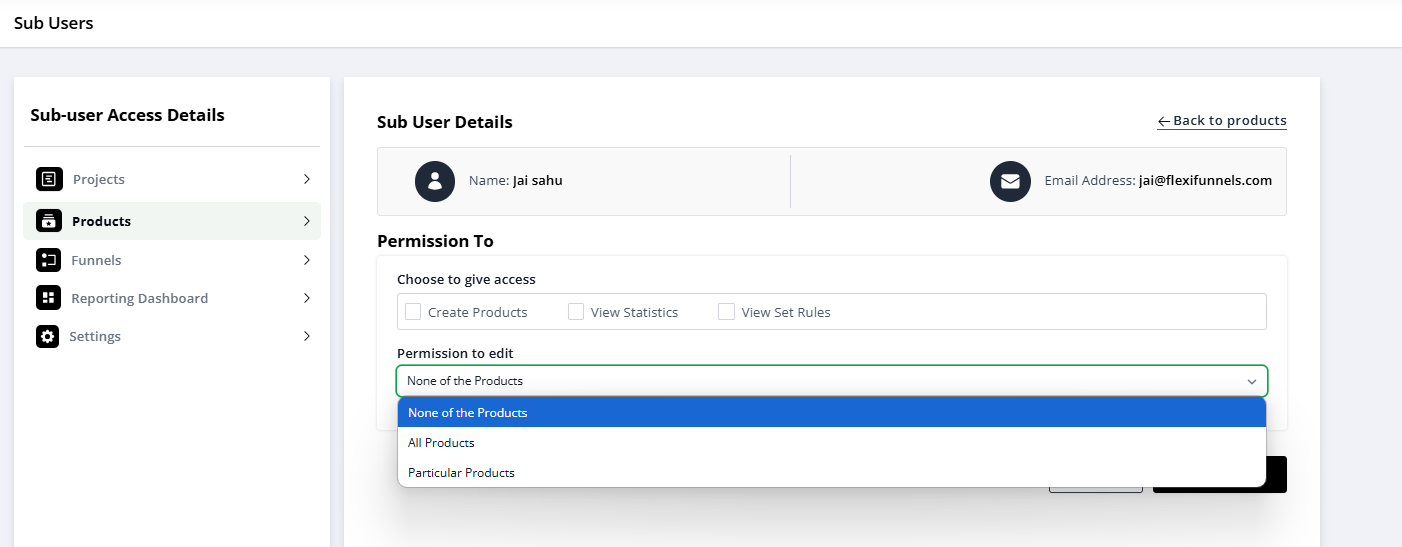
Step 7: Configure Product Permissions
Use the Products settings to define whether the sub-user can create products and which products they can edit.
- Create Products: Select this option when the sub-user should be able to add new products.
- Permission to Edit: Choose no product access, access to all products, or access to specific products.
A sub-user can edit only the individual products selected in the product checkbox list when specific product access is configured.
Step 8: Configure Funnel Permissions
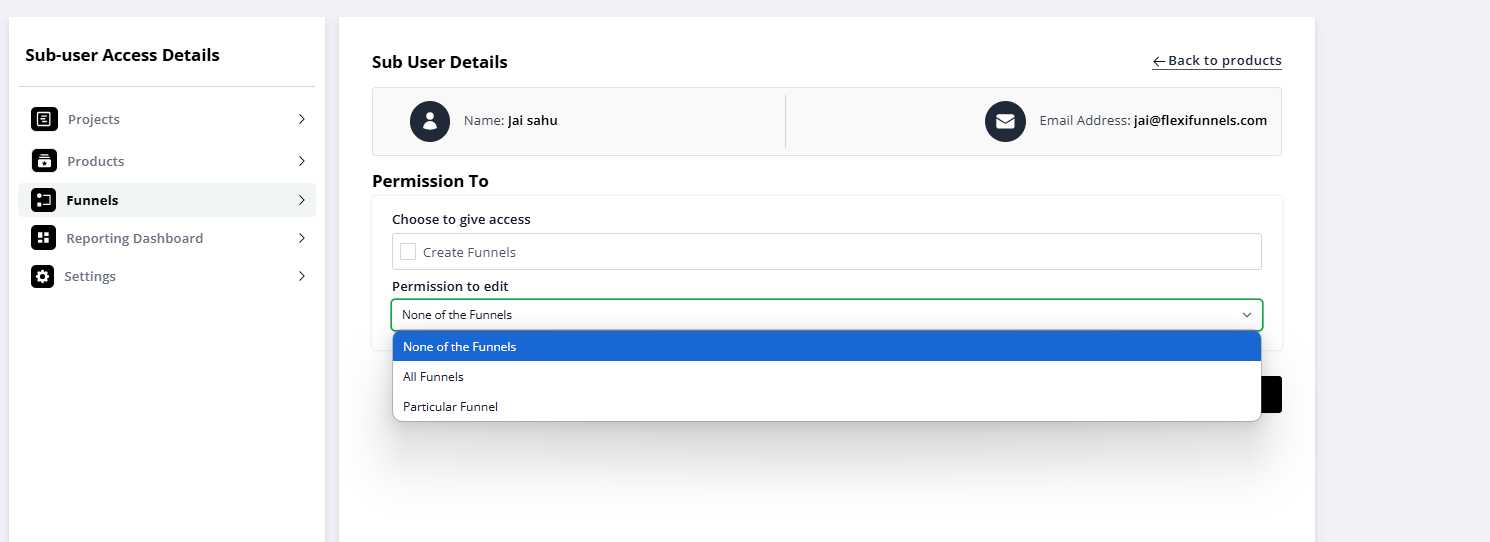
Use the Funnels settings to manage the sub-user's ability to create and edit funnels.
- Create Funnels: Select this option when the sub-user should be able to add new funnels.
- Permission to Edit: Choose no funnel access, access to all funnels, or access to selected funnels.
When you choose specific funnel access, the sub-user can edit only the funnels selected in the relevant checkbox list.
Step 9: Allow Reporting Dashboard Access
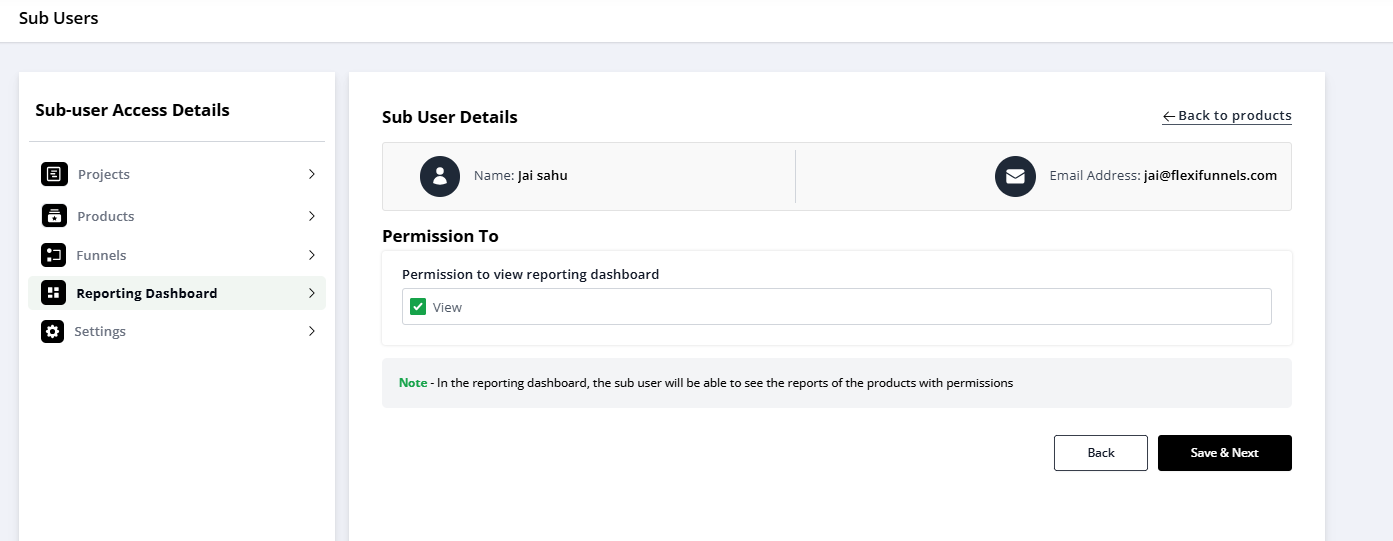
Select View under Reporting Dashboard to allow the sub-user to view reporting data.
Step 10: Configure Settings Permissions
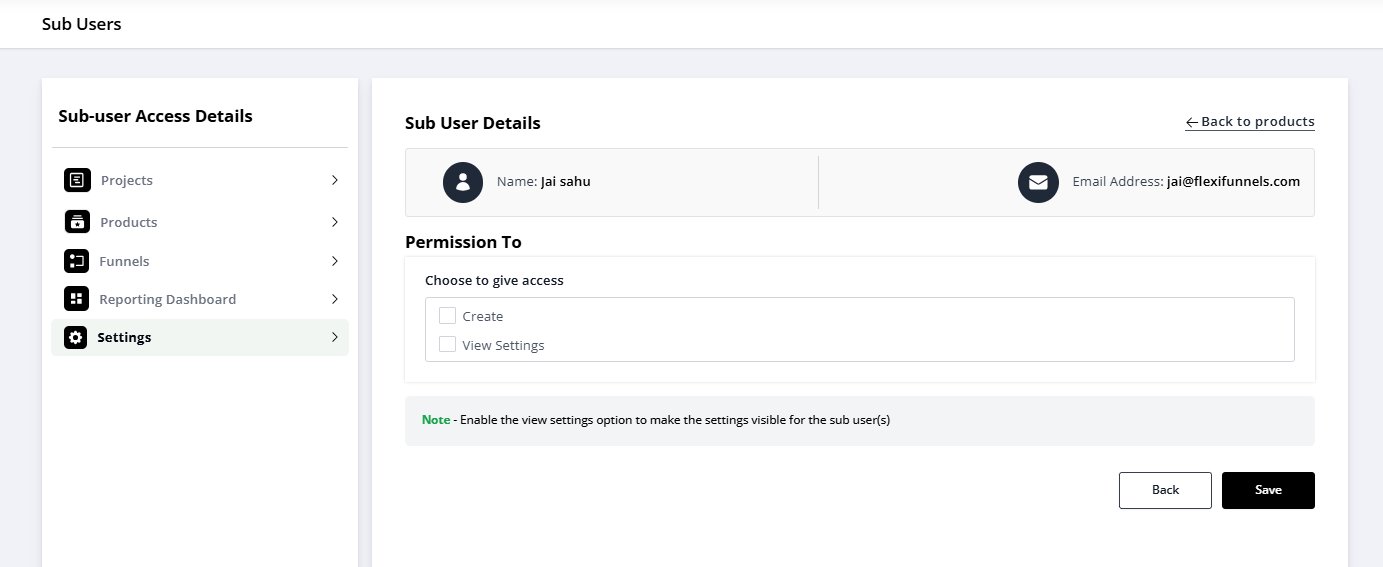
Use the Settings permissions to manage the sub-user's access to settings configured in the Settings tab.
- View Settings: Allows the sub-user to view the settings configured in the Settings tab.
- Permission to Edit: Allows you to grant editing access according to your requirements for each setting category.
You can configure editing permissions for the following categories:
- Autoresponder: Allow access to none, all, or selected autoresponders.
- Webinar: Allow access to none, all, or selected webinars.
- Payments: Allow access to none, all, or selected payment settings.
- Other: Allow access to none, all, or selected integrations.
- Domain: Allow access to none, all, or selected domains.
- Digital Assets: Allow access to none, all, or selected digital assets.
Step 11: Allow Creation in Settings
Select the Create checkbox when the sub-user should be able to add new items in the Settings area. With this permission enabled, a sub-user can create or add autoresponders, webinars, payments, other integrations, domains, and digital assets.
Verify the Configuration
Confirm that the sub-user appears in the Manage Sub Users list and that the intended access options are selected in Edit Access Details. Ask the sub-user to sign in and verify that they can access only the projects, products, funnels, reports, and settings assigned to them.
Common Scenarios
- Project collaboration: Give a team member access to selected projects without exposing all account projects.
- Product management: Allow a product manager to create or edit only the products they maintain.
- Funnel building: Grant a funnel specialist access to create and edit selected funnels.
- Reporting access: Allow a stakeholder to view reporting dashboards for approved products.
- Integration management: Give a technical collaborator access to selected autoresponders, payment settings, domains, or digital assets.
Best Practices
- Grant only the permissions required for the sub-user's responsibilities.
- Use specific project, product, funnel, and setting selections whenever possible.
- Verify the sub-user's email address before sending access.
- Review sub-user permissions when responsibilities change.
- Remove or update access when a contractor or collaborator no longer needs it.
- Test access with the sub-user after configuring permissions.
Before Contacting Support
- Confirm that the sub-user email address is valid and entered correctly.
- Verify that the sub-user has been added under Manage Sub Users.
- Review the selected permissions in Edit Access Details.
- Confirm that access has been granted to the relevant projects, products, funnels, or settings.
- Ask the sub-user to sign out and sign in again before retesting access.
Expected Outcome
The sub-user receives access through their valid email address and can sign in to FlexiFunnels. They can view, edit, or create only the resources and settings permitted by the Account Owner.
Was this article helpful?
That’s Great!
Thank you for your feedback
Sorry! We couldn't be helpful
Thank you for your feedback
Feedback sent
We appreciate your effort and will try to fix the article