Overview
UTM parameters are tags added to a URL to identify the traffic source and marketing campaign associated with a product sale. When a visitor purchases through a UTM-enabled sales page, the UTM values can be passed through the funnel and captured in Google Sheets through a webhook.
Use UTM tracking to analyze the channels, advertisements, partners, keywords, and campaigns that generate product sales. This article uses the Google Campaign URL Builder as an example; you can use another UTM builder if it meets your requirements.
Before You Begin
- A FlexiFunnels account with access to the product and sales page.
- A published FlexiFunnels sales page URL.
- A Google Sheet and product webhook configured to receive product data.
- The campaign source, medium, name, and optional term or content values to track.
Understanding UTM Parameters
- Campaign Source (
utm_source): Identifies the traffic source, such as Google or Facebook. - Campaign Medium (
utm_medium): Identifies the marketing medium, such as CPC or banner. - Campaign Name (
utm_campaign): Identifies the campaign, such as OctoberSale. - Campaign Term (
utm_term): Optionally identifies a keyword. - Campaign Content (
utm_content): Optionally distinguishes similar ads or links.
Example UTM link: https://yourwebsite.com?utm_source=google&utm_medium=cpc&utm_campaign=octobersale&utm_term=wintershoes
Step 1: Create a Product Webhook for Google Sheets
Create a webhook connection that sends product data to Google Sheets. This connection enables UTM values associated with product activity to be recorded for reporting.
Article links: https://help.flexifunnels.com/en/support/solutions/articles/36000478569-how-to-send-the-product-data-and-lead-form-data-to-google-sheets-without-using-the-3rd-party-tool-
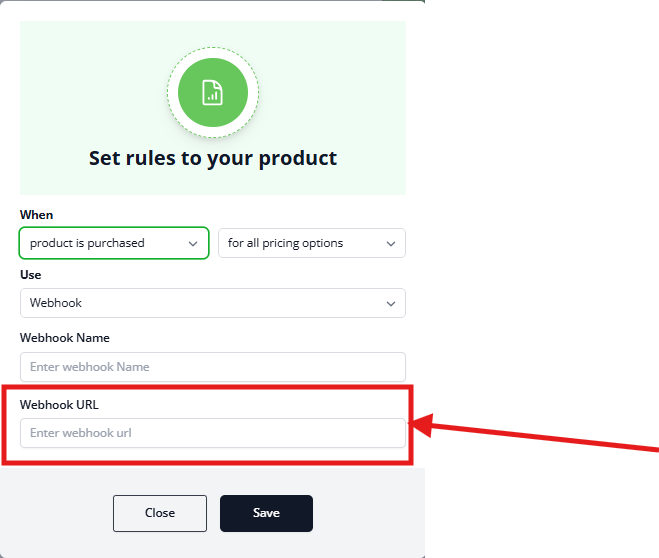
Step 2: Add the Webhook to the Product
Open the relevant product in FlexiFunnels and add the webhook URL in the product settings. This allows product data and associated UTM values to be sent to the connected Google Sheet.
Step 3: Build a UTM-Enabled Sales Page URL
Open the Google Campaign URL Builder and enter the published sales page URL: https://ga-dev-tools.google/campaign-url-builder/
You can also use another UTM builder, such as .
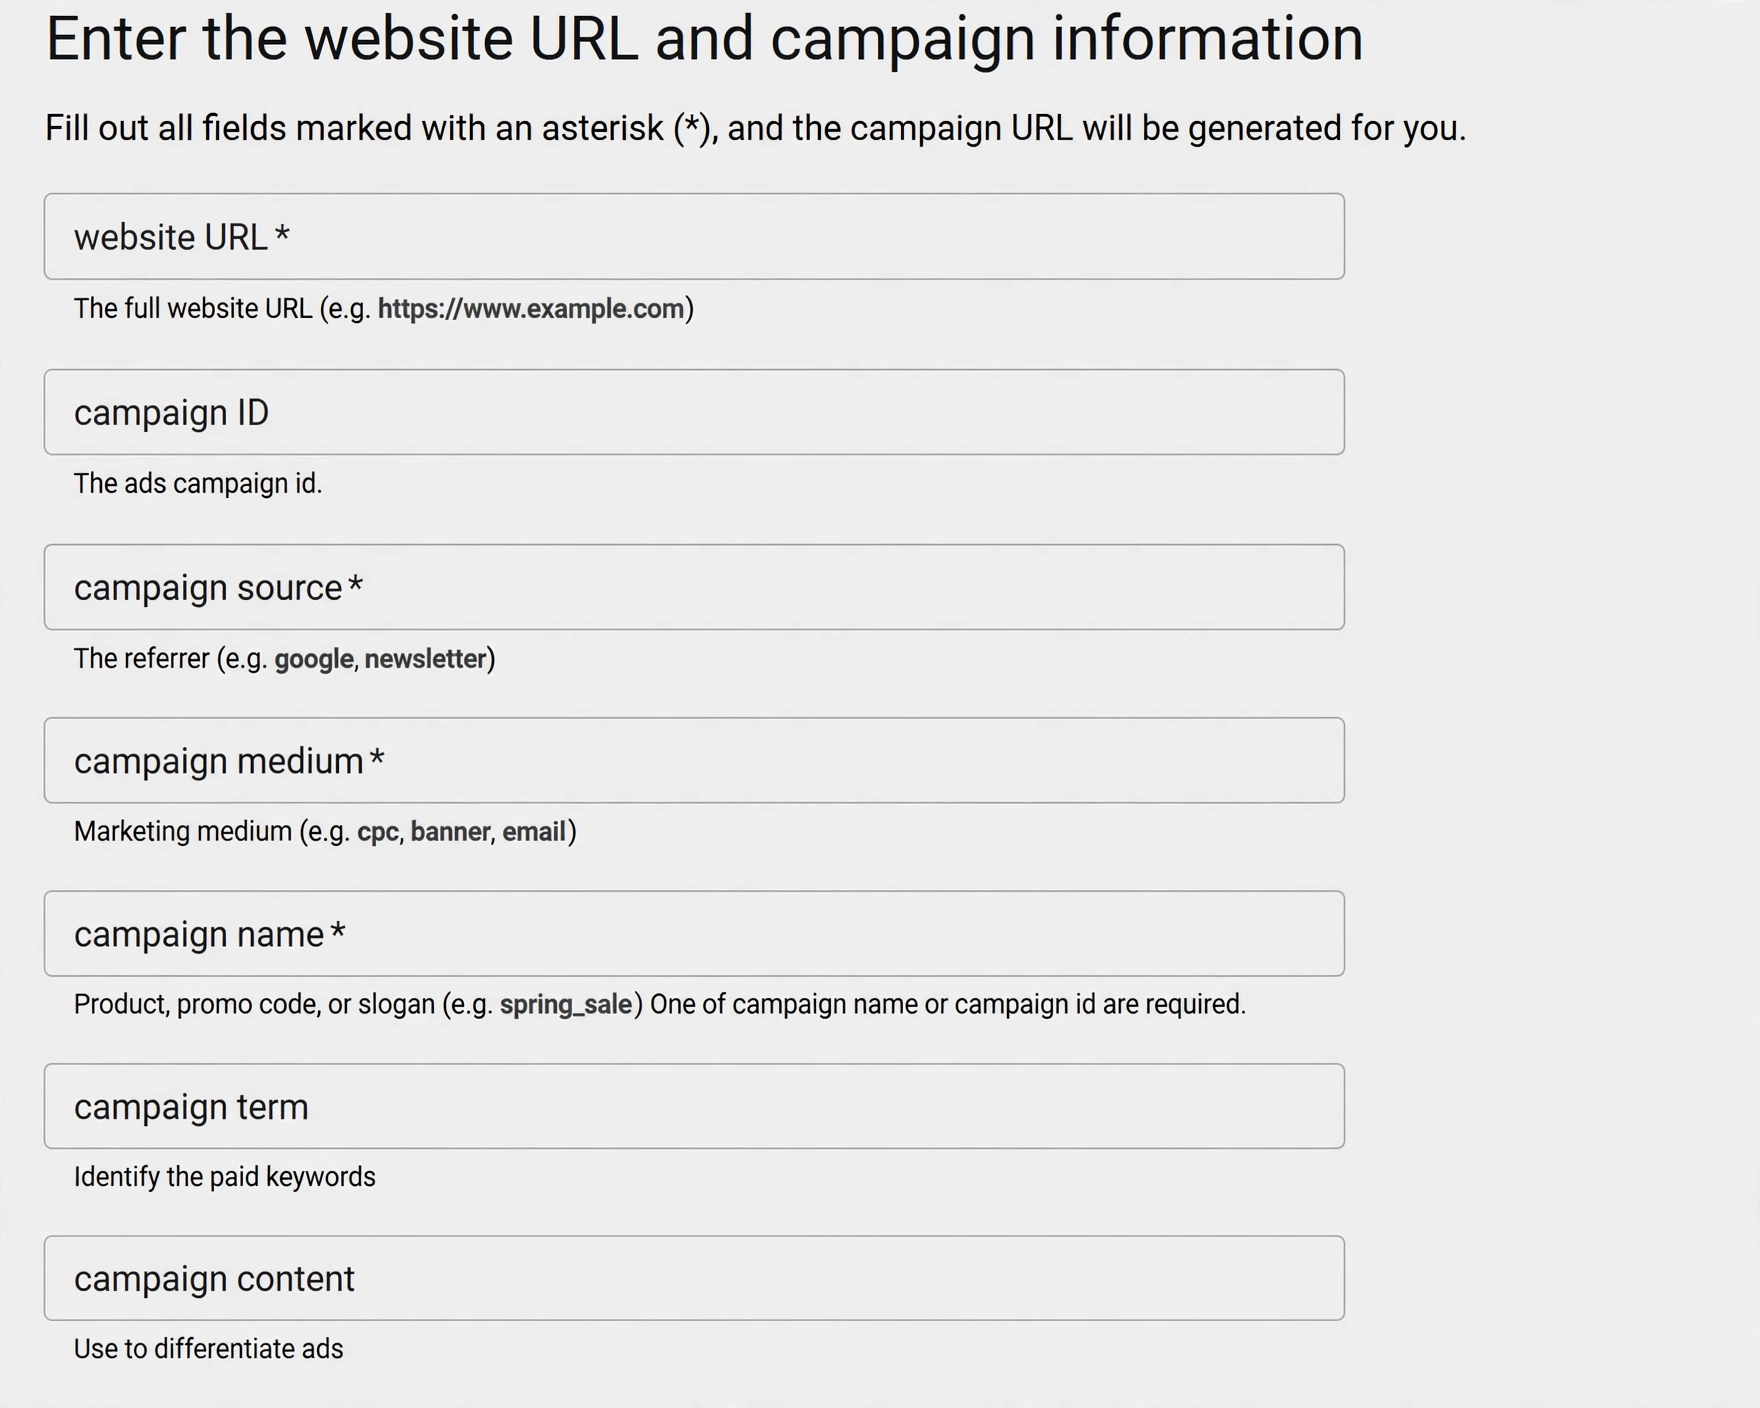
Step 4: Enter Campaign Information
Complete the available UTM fields before generating the URL. Use consistent naming so that campaign data remains easy to filter and compare.
- Campaign ID: Enter an optional campaign identifier, if applicable.
- Campaign Source: Enter the traffic source, for example, Google.
- Campaign Medium: Enter the medium, for example, CPC or Banner.
- Campaign Name: Enter a descriptive campaign name, such as OctoberSale.
- Campaign Term: Optionally enter the keyword used for the campaign.
- Campaign Content: Optionally identify a specific ad or link variation.
Step 5: Generate the UTM Link
After entering the campaign information, generate and copy the UTM-enabled sales page URL. Use this URL in the applicable advertisement, email, affiliate promotion, or social media campaign.
Step 6: Pass UTM Parameters Through the Sales Funnel
Configure the sales page to append UTM parameters to subsequent pages, such as the checkout or thank-you page. When visitors continue through the funnel, the UTM values are retained for tracking while the visible URL remains clean.
Example: A visitor can arrive through https://yourwebsite.com/salespage?utm_source=google&utm_medium=cpc&utm_campaign=sale and proceed to https://yourwebsite.com/checkout. The checkout URL remains clean while the UTM values continue to be available for analytics and Google Sheets reporting.
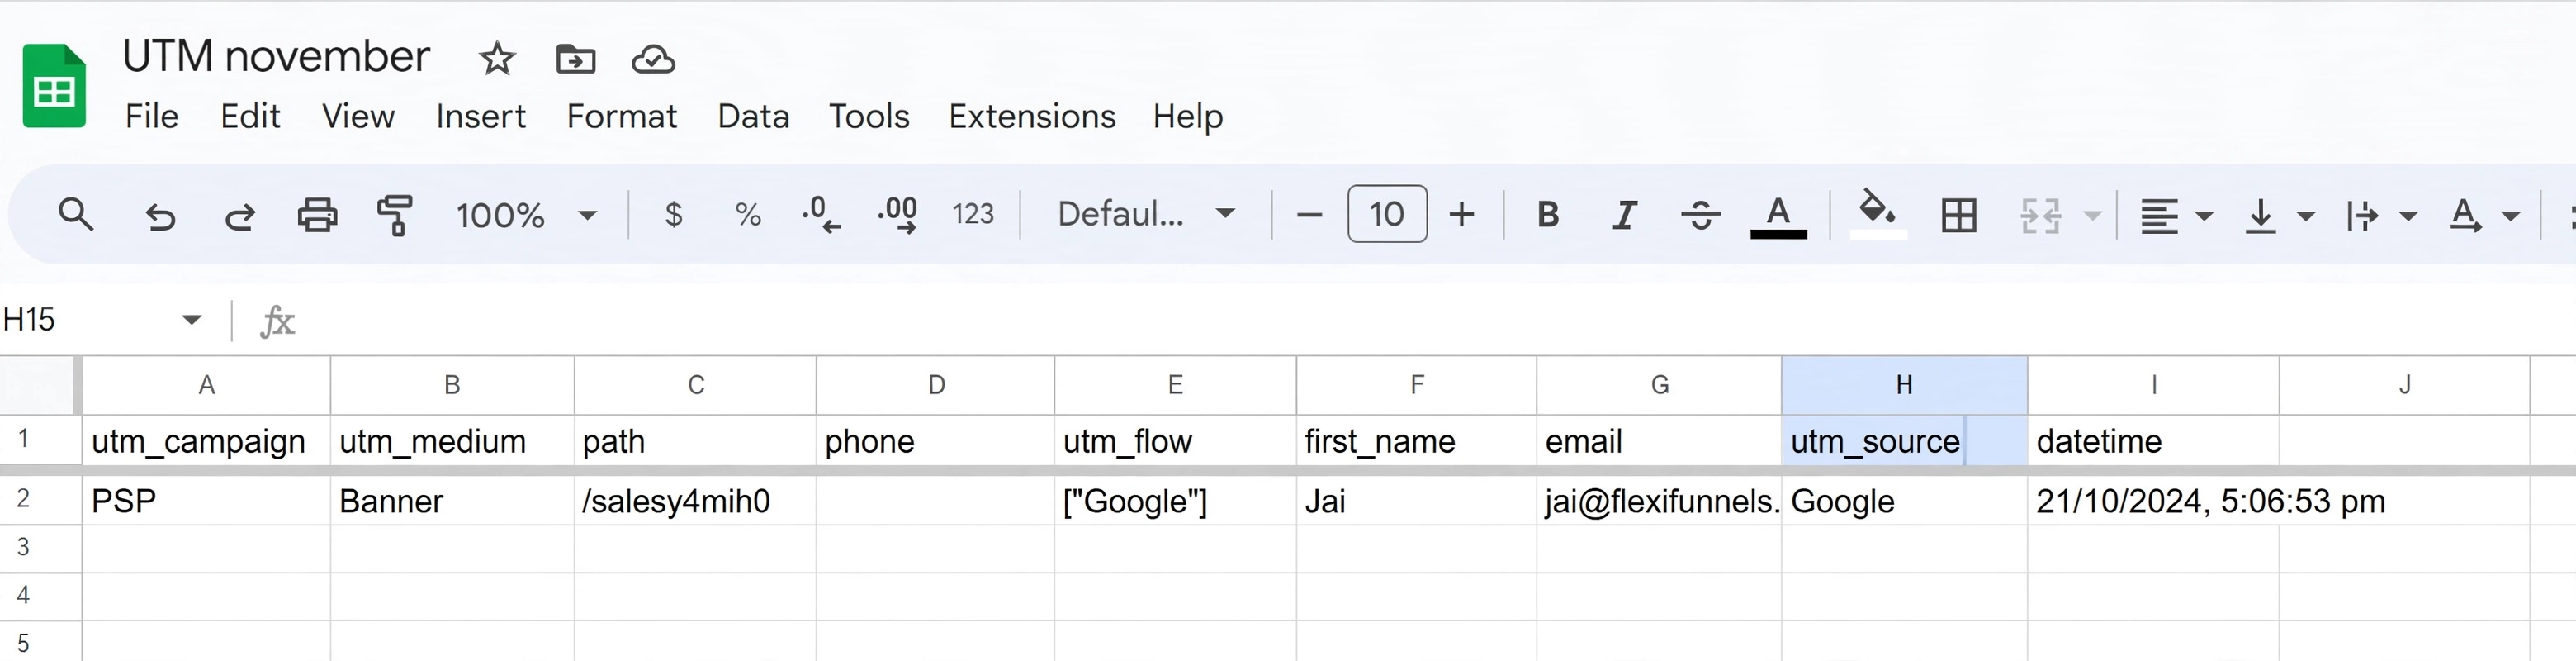
Step 7: Test and Validate UTM Tracking
Open the generated UTM link in a test environment and complete a sample product journey. Then review the connected Google Sheet to confirm that the expected UTM values were captured.
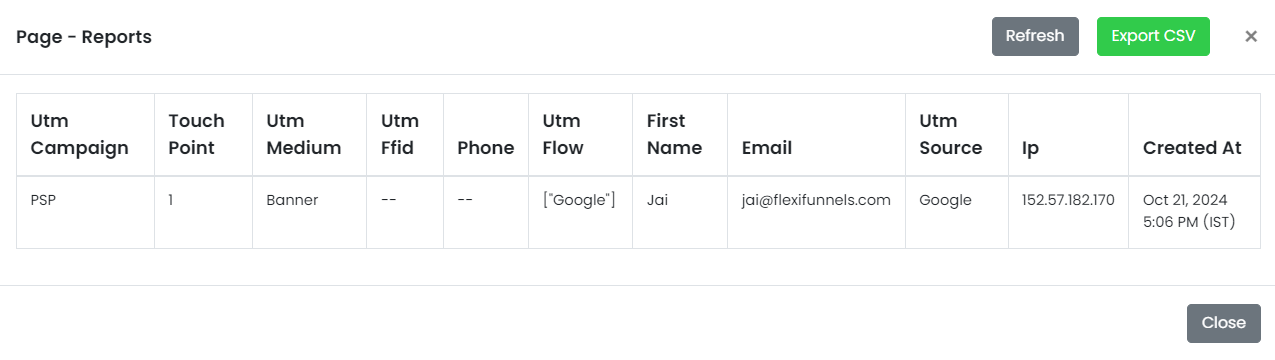
Verify the Configuration
Confirm that the generated URL contains the intended UTM values. Test the product sales flow, then verify that the connected Google Sheet records the UTM parameters with the product data.
Common Scenarios
- Campaign performance: Compare sales from paid ads, email campaigns, and social media.
- A/B testing: Use distinct campaign content values to compare similar ad variations.
- Affiliate tracking: Track sales generated by individual affiliates or partners.
- Social media analysis: Compare product sales generated from different social platforms.
Best Practices
- Use consistent lowercase naming for UTM values.
- Use clear campaign names and content labels.
- Test every UTM-enabled URL before using it in a live campaign.
- Keep the published sales page URL available for comparison during testing.
- Verify that parameters persist through the checkout flow.
Before Contacting Support
- Confirm that the product webhook is connected to the correct Google Sheet.
- Verify that the UTM URL opens the published sales page.
- Complete a test product journey through the sales and checkout pages.
- Check the Google Sheet for the submitted UTM values.
- Confirm that UTM values are retained through the configured funnel pages.
Expected Outcome
After configuration, product journeys that begin with a UTM-enabled URL retain their campaign data through the configured funnel flow. The connected Google Sheet captures the UTM values with the corresponding product data for campaign reporting.
Related Articles
Was this article helpful?
That’s Great!
Thank you for your feedback
Sorry! We couldn't be helpful
Thank you for your feedback
Feedback sent
We appreciate your effort and will try to fix the article