Overview
Tab Messaging lets you display changing messages and notifications in a visitor’s browser tab. It can update the tab title, display a notification icon, and play a notification sound when a visitor moves away from your published FlexiFunnels page.
Use Tab Messaging to bring attention back to an open page, such as a checkout page, an offer page, an appointment page, or a virtual-event registration page.
Before You Begin
- Sign in to your FlexiFunnels account.
- Open the required landing page in the FlexiFunnels page editor.
- Prepare up to five short tab messages.
- Publish the page after saving the Tab Messaging configuration.
- Use a desktop browser to test the feature, as Tab Messaging is available for desktop browser environments.
Video Tutorial
Step 1: Open Tab Messaging Settings
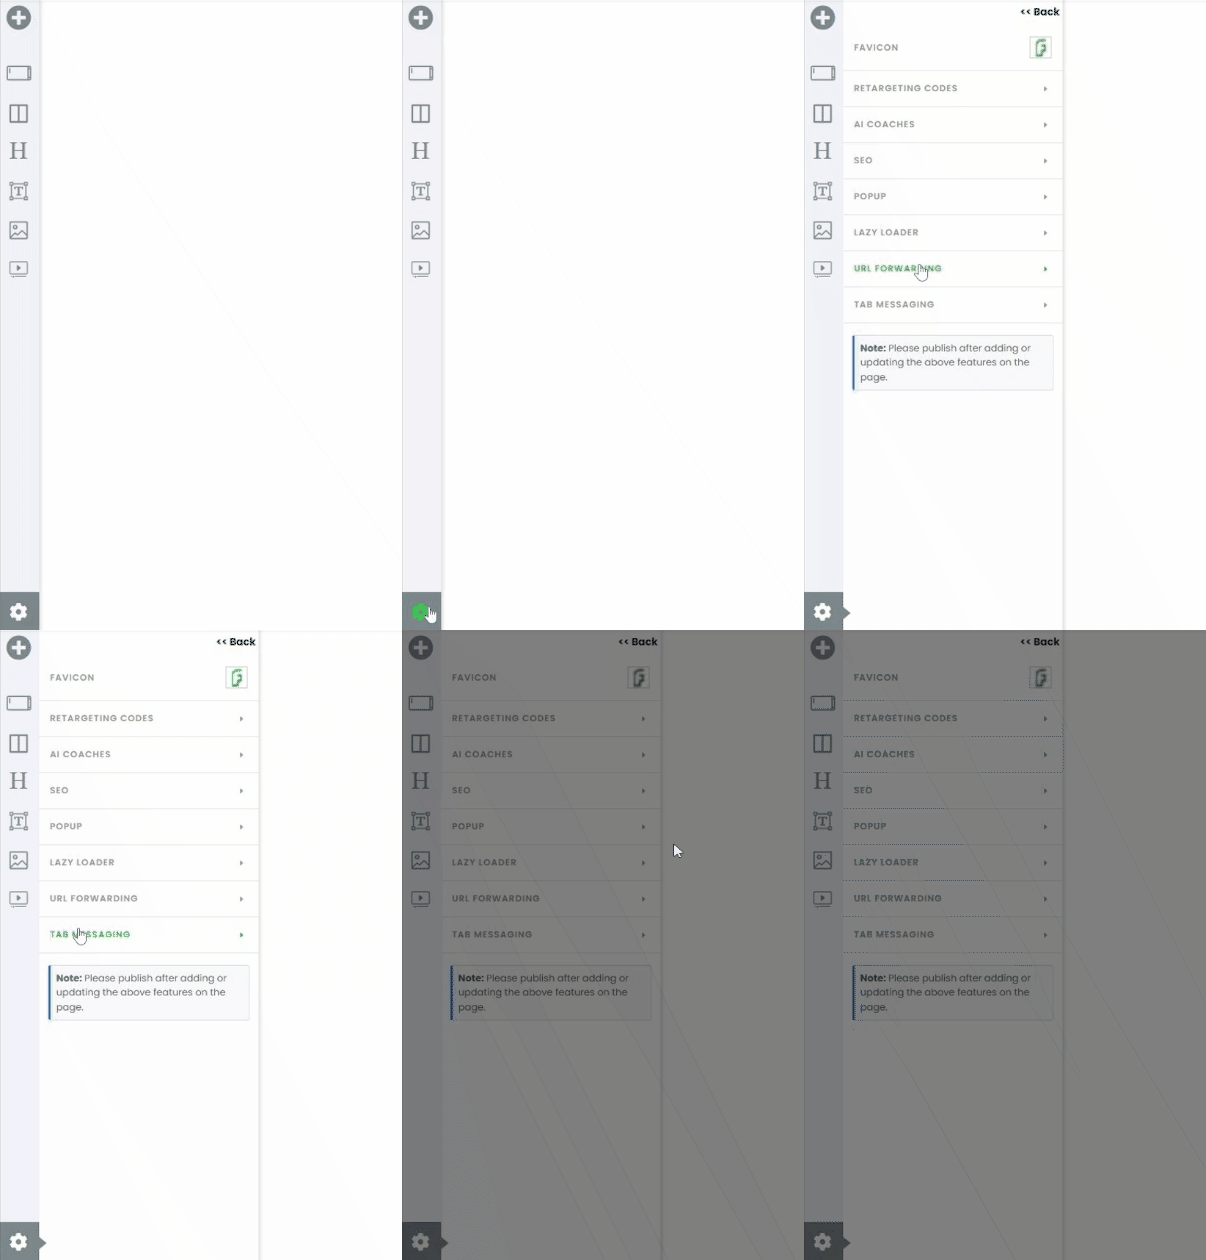
Open the relevant page in the FlexiFunnels editor. In the lower-left corner, select the gear icon to open page settings, then select Tab Messaging.
Step 2: Enable Tab Messaging
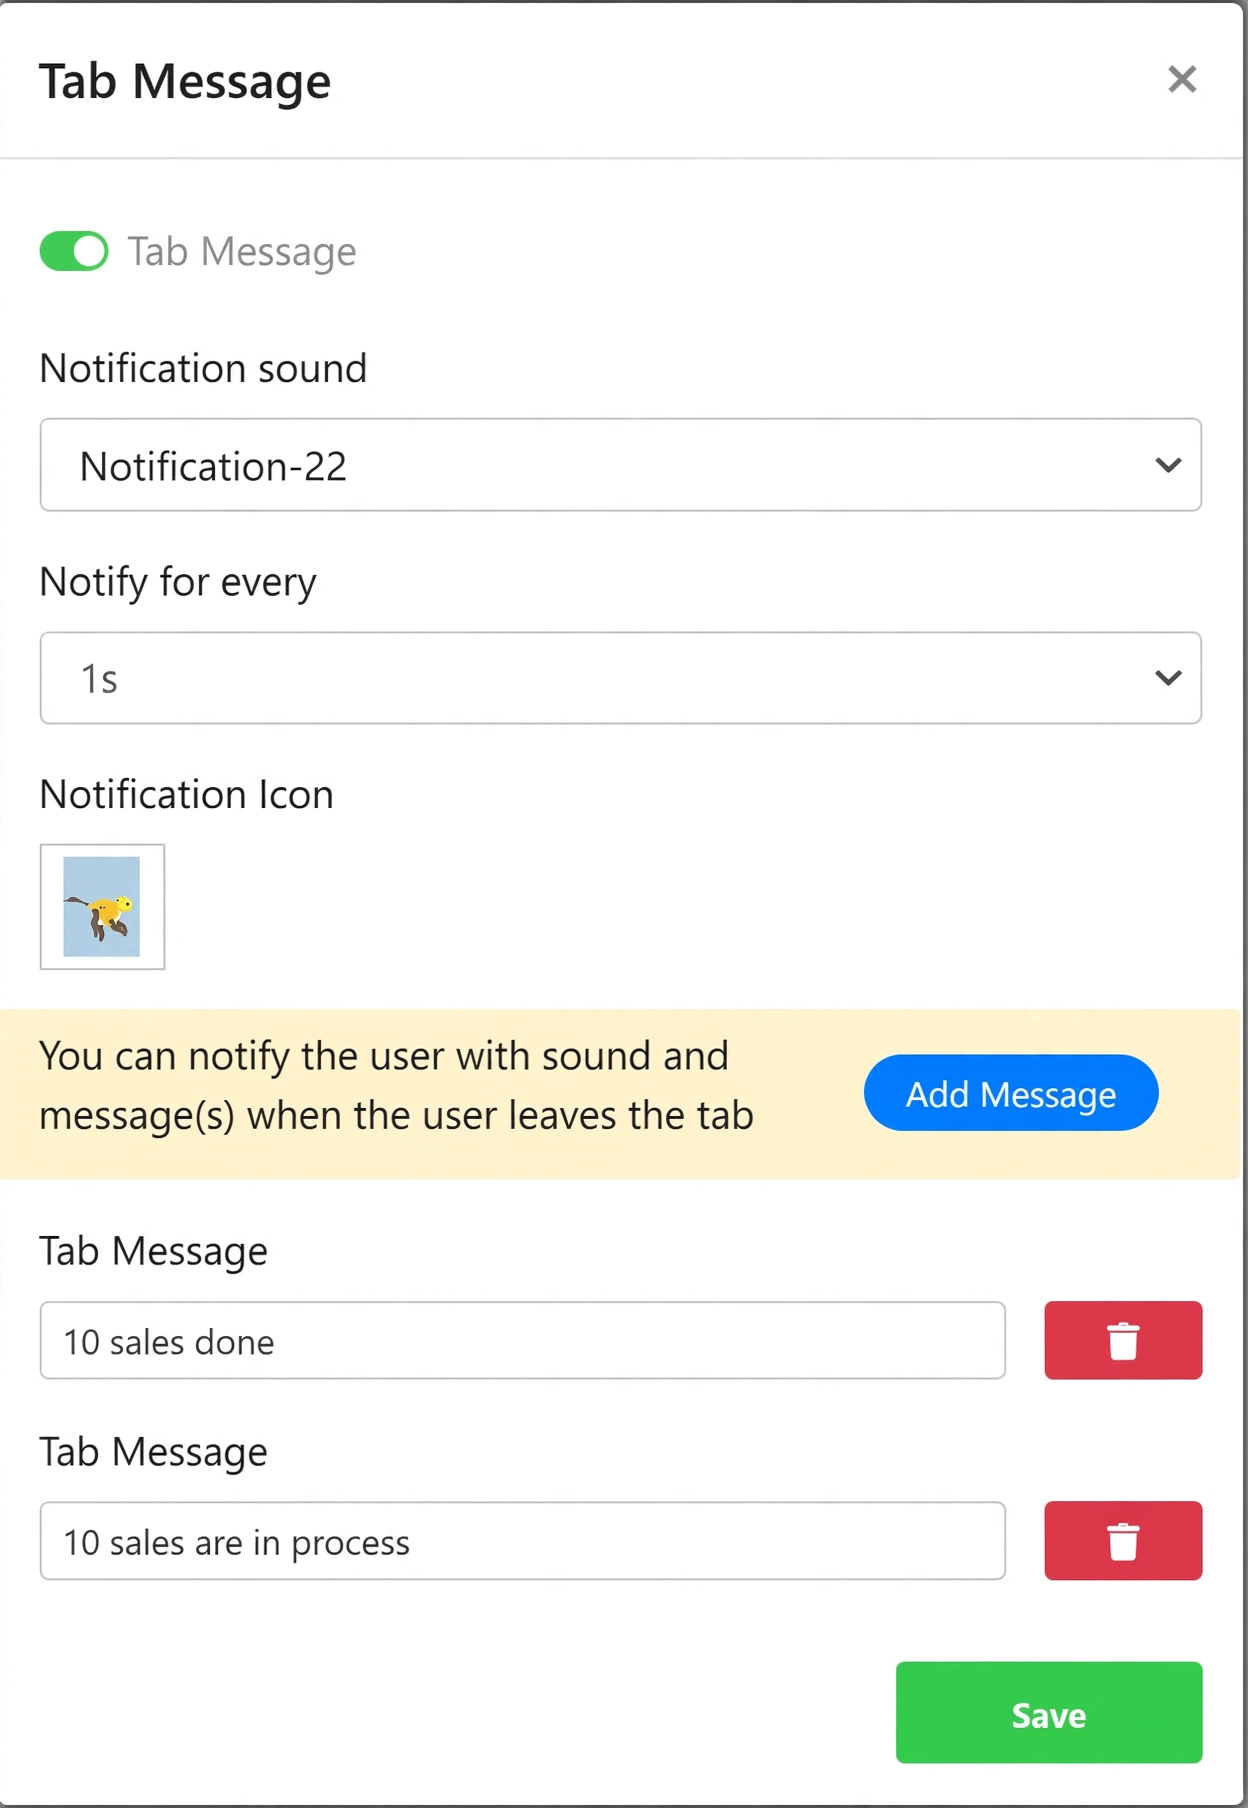
The Tab Messaging settings window opens. Enable the Tab Messaging toggle before configuring the available options. The feature will not run on the published page until the toggle is enabled and the page is published.
Step 3: Configure the Notification Sound
Select a notification sound to accompany the tab message. The sound can help draw the visitor’s attention when they move to another browser tab after interacting with the published page.

Important: The notification sound plays only after a visitor has clicked the published page URL. It plays a maximum of two times.
Step 4: Set the Notification Interval
Use Notify for Every to define the interval at which the notification sound is played. Available intervals include 5, 10, 25, 30, and 60 seconds.

Step 5: Add a Notification Icon
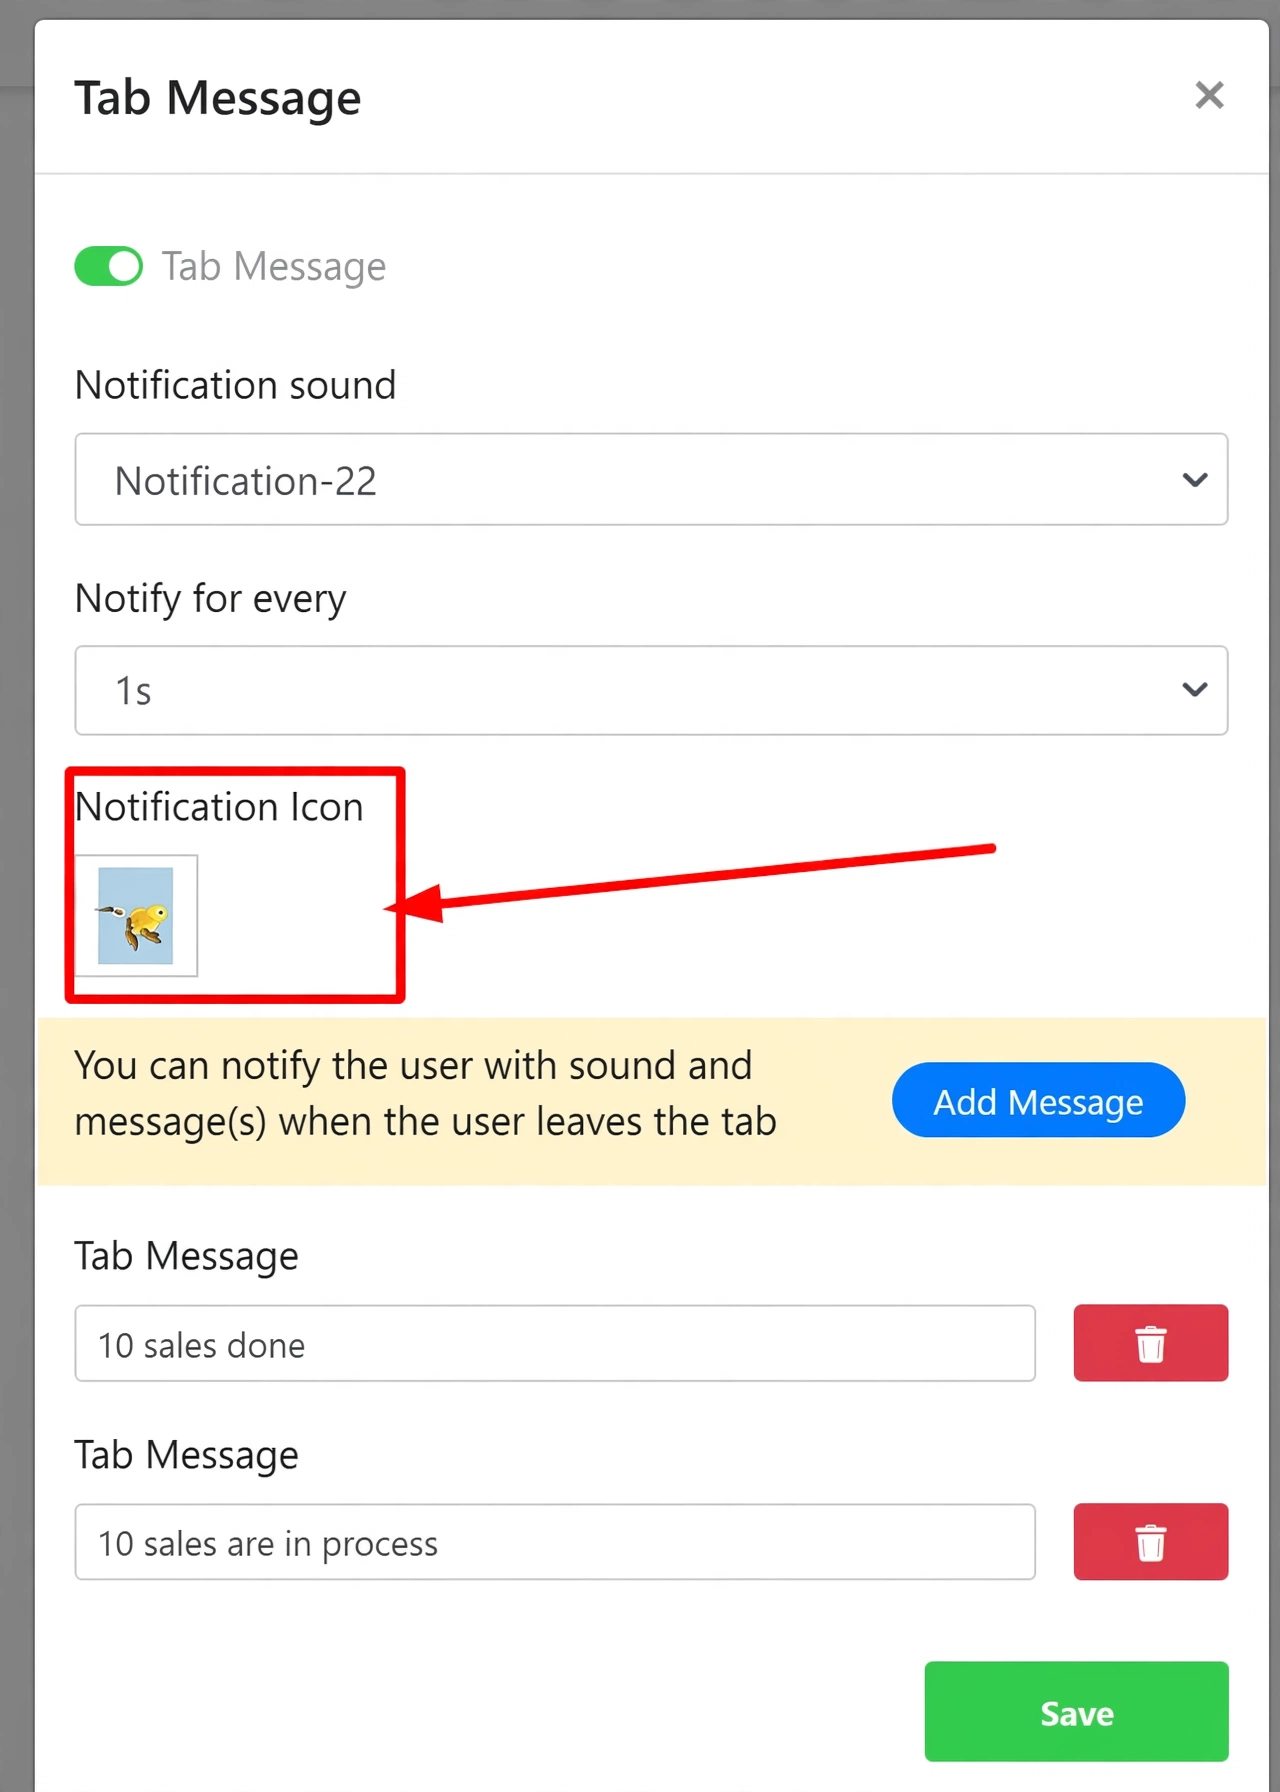
Use the Notification Icon setting to add an icon that represents the tab message. The icon is displayed in the browser tab alongside the configured message.
Step 6: Add Tab Messages
Use Add Message to enter the messages that will rotate in the browser tab. You can add a maximum of five tab messages. Keep each message brief so it remains readable in a browser tab.


Step 7: Save and Publish the Page
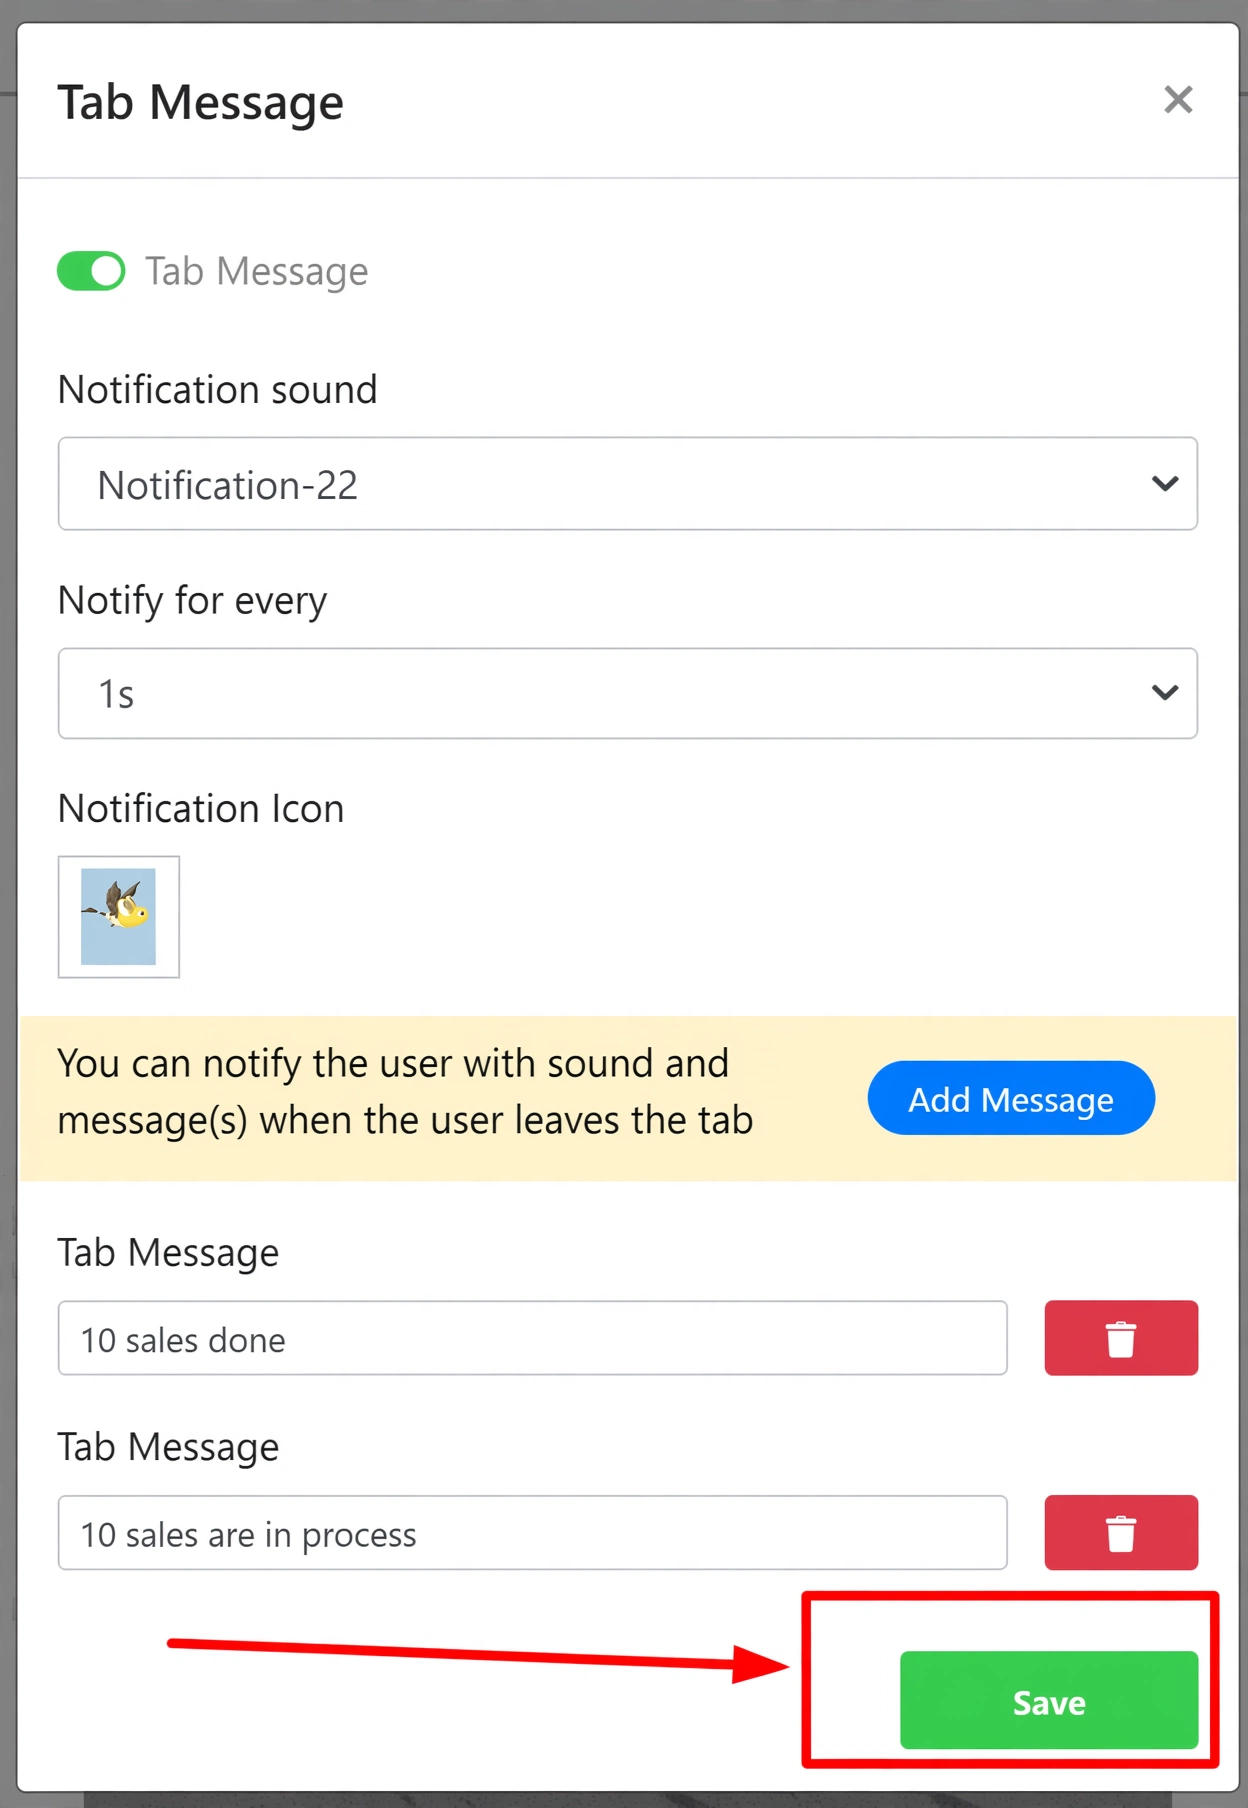
After configuring the sound, timing, icon, and messages, save your changes. Publish the landing page to apply Tab Messaging to the live page. If you later change the page domain or slug, publish the page again.
Verify the Configuration
Open the published URL in a desktop browser and interact with the page. Then switch to another tab and confirm that the browser tab title changes through the configured messages. If a notification sound is enabled, verify that it plays according to the selected interval and no more than twice.


Common Scenarios
- Checkout reminders: Display a message that reminds visitors about items remaining in their cart.
- Limited-time offers: Use messages to bring attention to an active promotion or deadline.
- Appointment reminders: Remind visitors about upcoming appointments, reservations, or deadlines.
- Virtual events: Remind registered users about upcoming webinars, conferences, challenges, or live streams.
- New notifications: Display messages that encourage visitors to return to the page to review an update or offer.
Best Practices
- Use concise messages that are easy to understand in a browser tab.
- Use no more than five messages per page.
- Select a notification interval that does not disrupt the visitor experience.
- Use an icon that clearly supports the purpose of the message.
- Test the feature on the published page, not only in the editor.
- Publish the page again after changing its domain or slug.
- Use Tab Messaging only where the message is relevant to the page content and visitor action.
Before Contacting Support
- Confirm that Tab Messaging is enabled in page settings.
- Verify that no more than five messages have been added.
- Confirm that the page has been saved and published.
- Test from the published URL in a desktop browser.
- Click the published page before switching to another browser tab when testing notification sound.
- Republish the page if its domain or slug was changed.
Expected Outcome
After successful configuration and publication, the browser tab for your FlexiFunnels page displays the selected icon and rotates through the configured messages when the visitor switches away from the tab. Notification sound behavior follows the interval and playback limits you selected.
Related Articles
- checkout page
- Publishing a FlexiFunnels landing page
- Managing page settings in the FlexiFunnels editor
Was this article helpful?
That’s Great!
Thank you for your feedback
Sorry! We couldn't be helpful
Thank you for your feedback
Feedback sent
We appreciate your effort and will try to fix the article