Overview
Xendit integration enables you to securely accept online payments through your FlexiFunnels checkout pages. This guide walks you through creating a Xendit account, generating API credentials, connecting your account with FlexiFunnels, testing the integration, and understanding important currency limitations before going live.
Before You Begin
- An active FlexiFunnels account.
- A verified Xendit merchant account.
- Administrator access to your Xendit Dashboard.
- Your Xendit Secret API Key and Public Key.
Step 1: Create Your Xendit Account
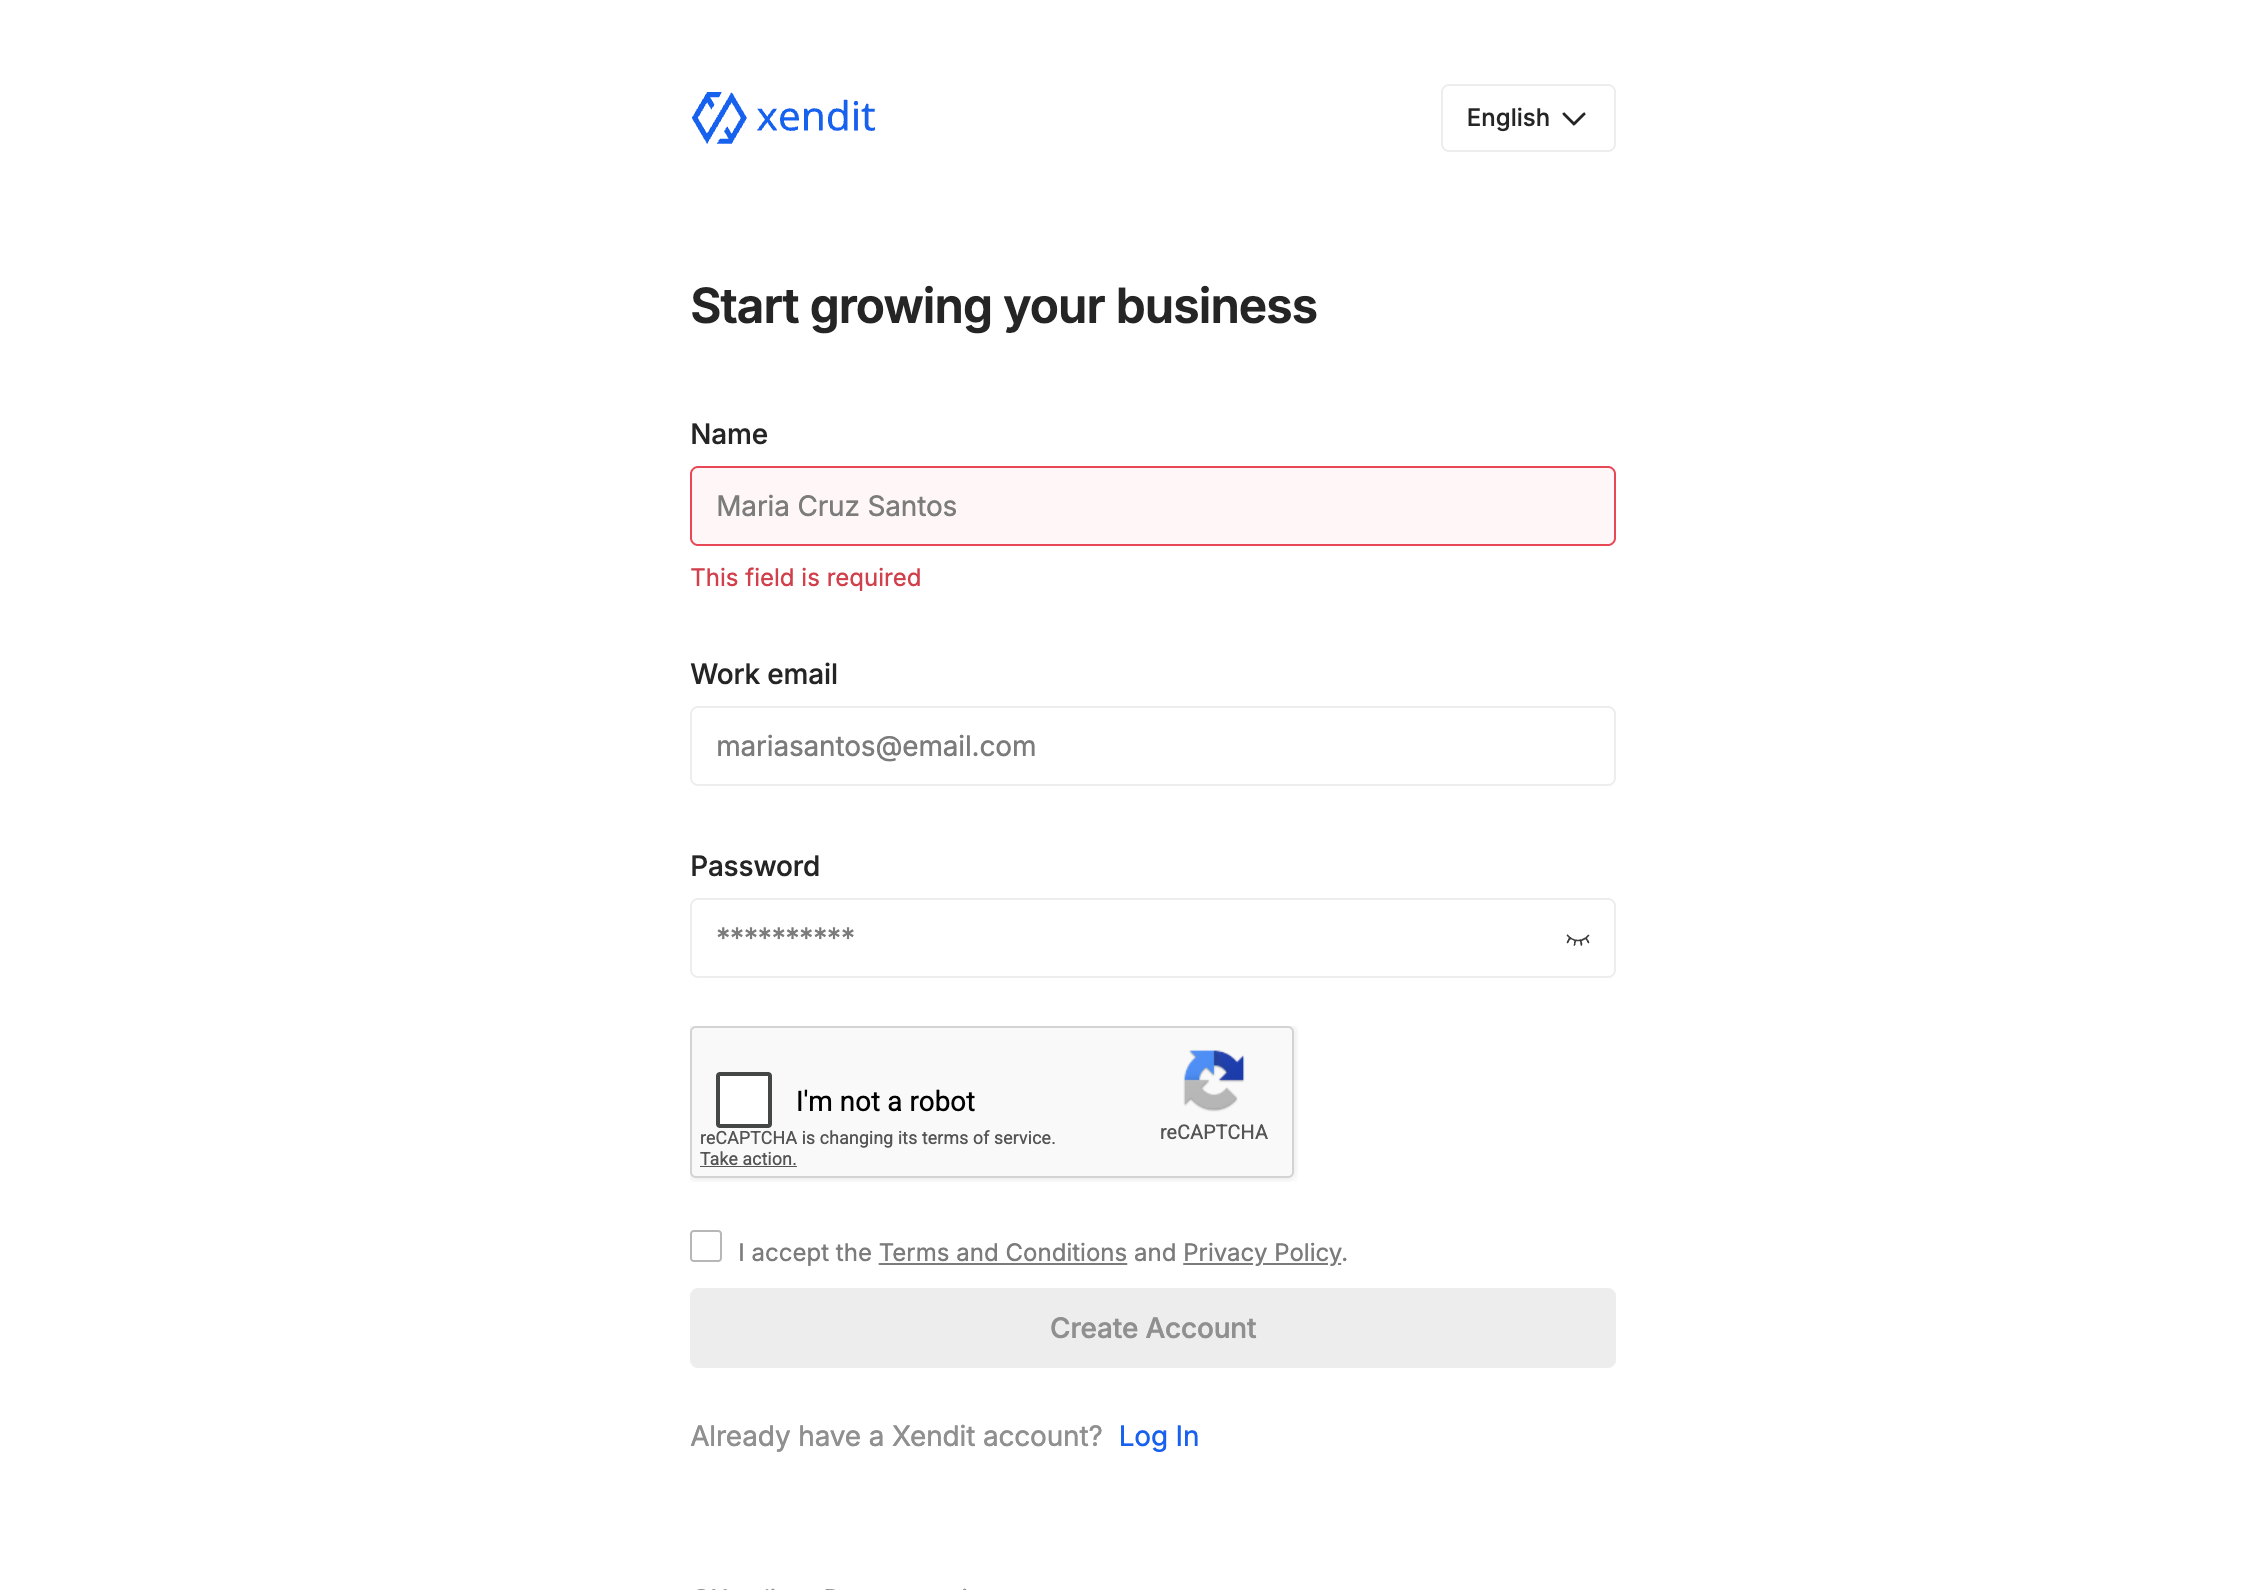
If you don't already have a Xendit account, create one before proceeding with the integration.
- Visit https://dashboard.xendit.co/register.
- Sign up for a new Xendit merchant account.
- Your Xendit account is permanently associated with the country and currency selected during registration.
- These settings cannot be changed later.
- Choose the country and currency carefully based on where you intend to accept payments.
Step 2: Generate Your Xendit API Keys
FlexiFunnels requires your Xendit API credentials to establish a secure connection.
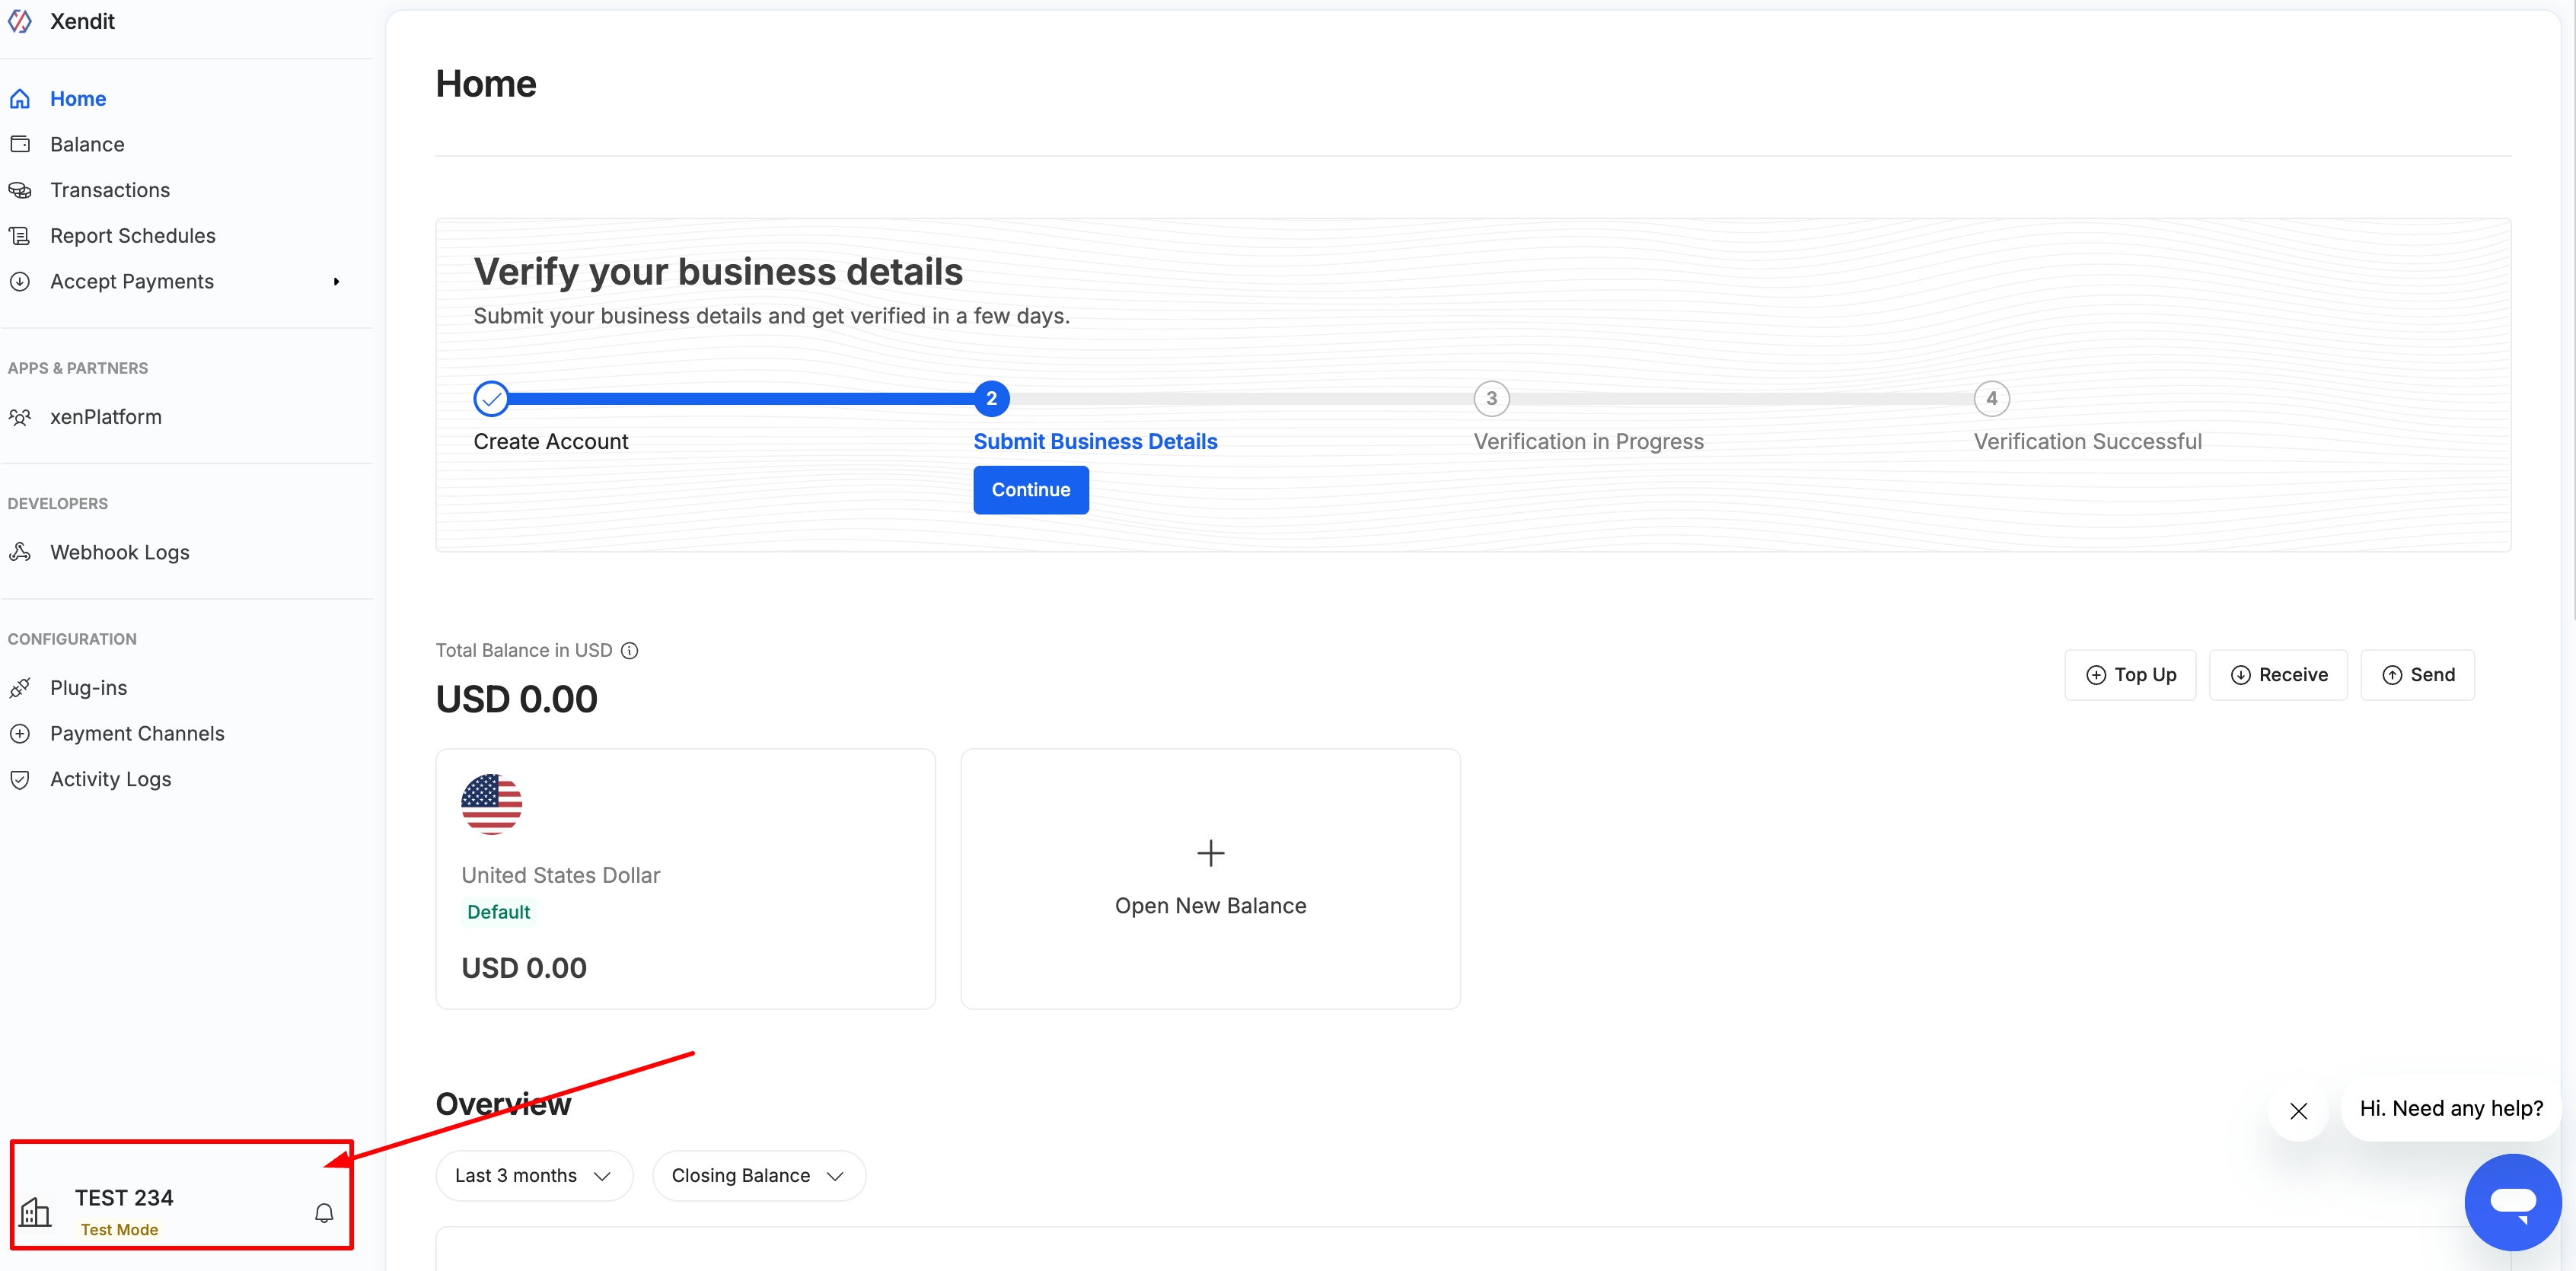
- Log in to your Xendit Dashboard.
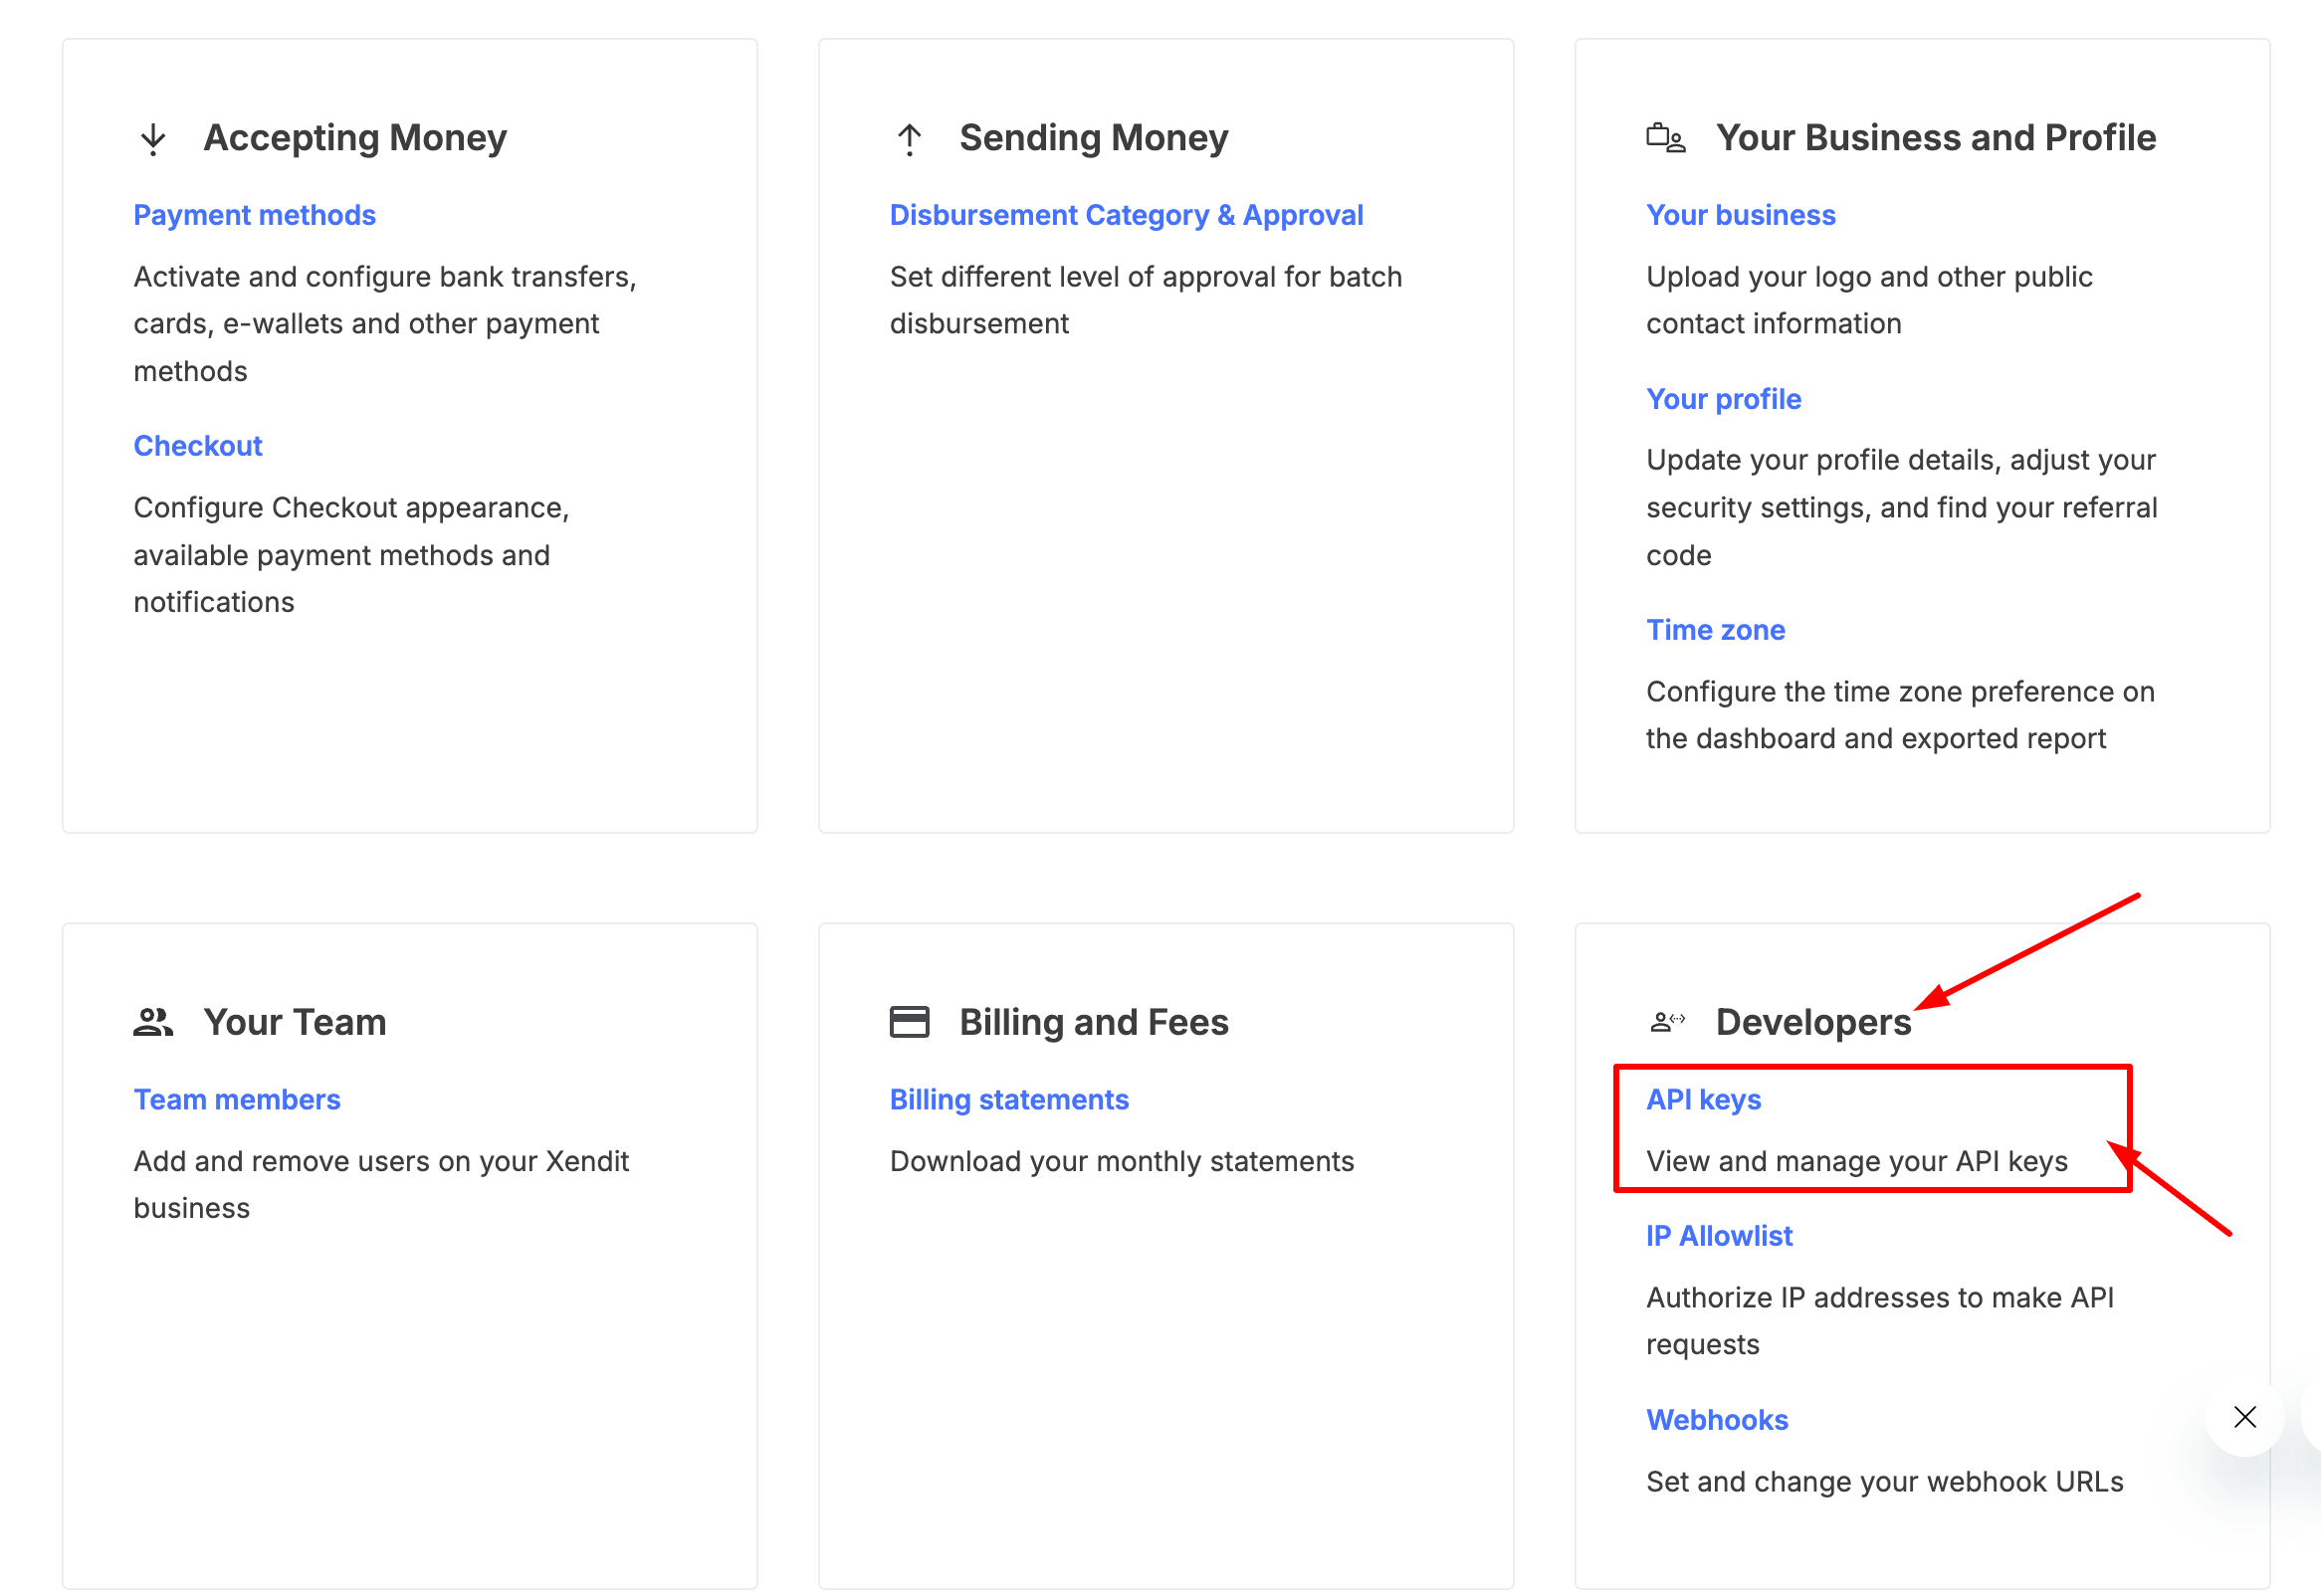
- Click your Profile icon located in the bottom-left corner.
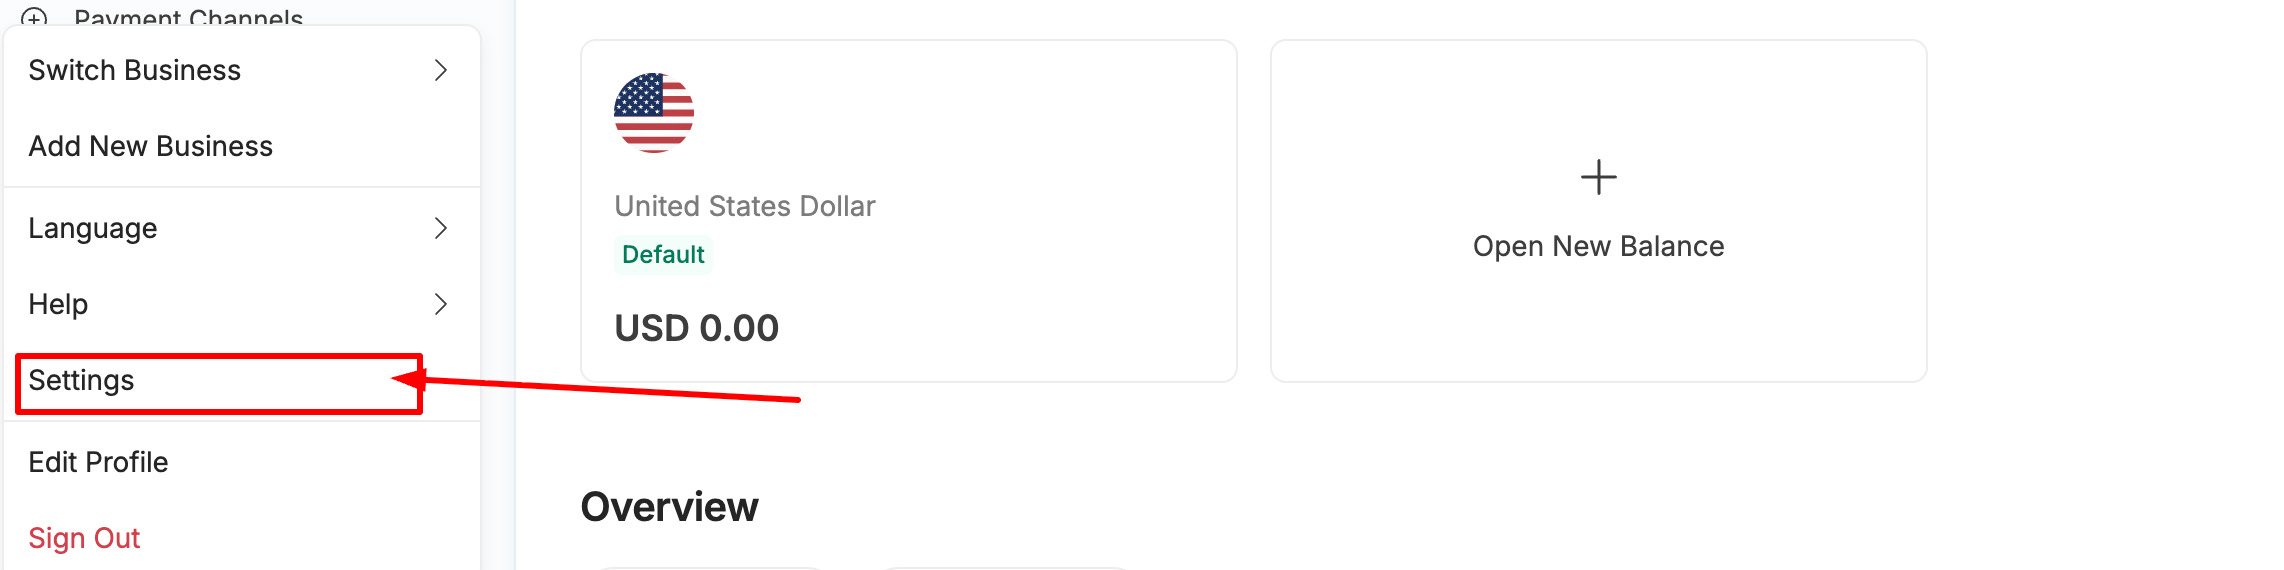
- Navigate to Settings.
- Open the Developers section.
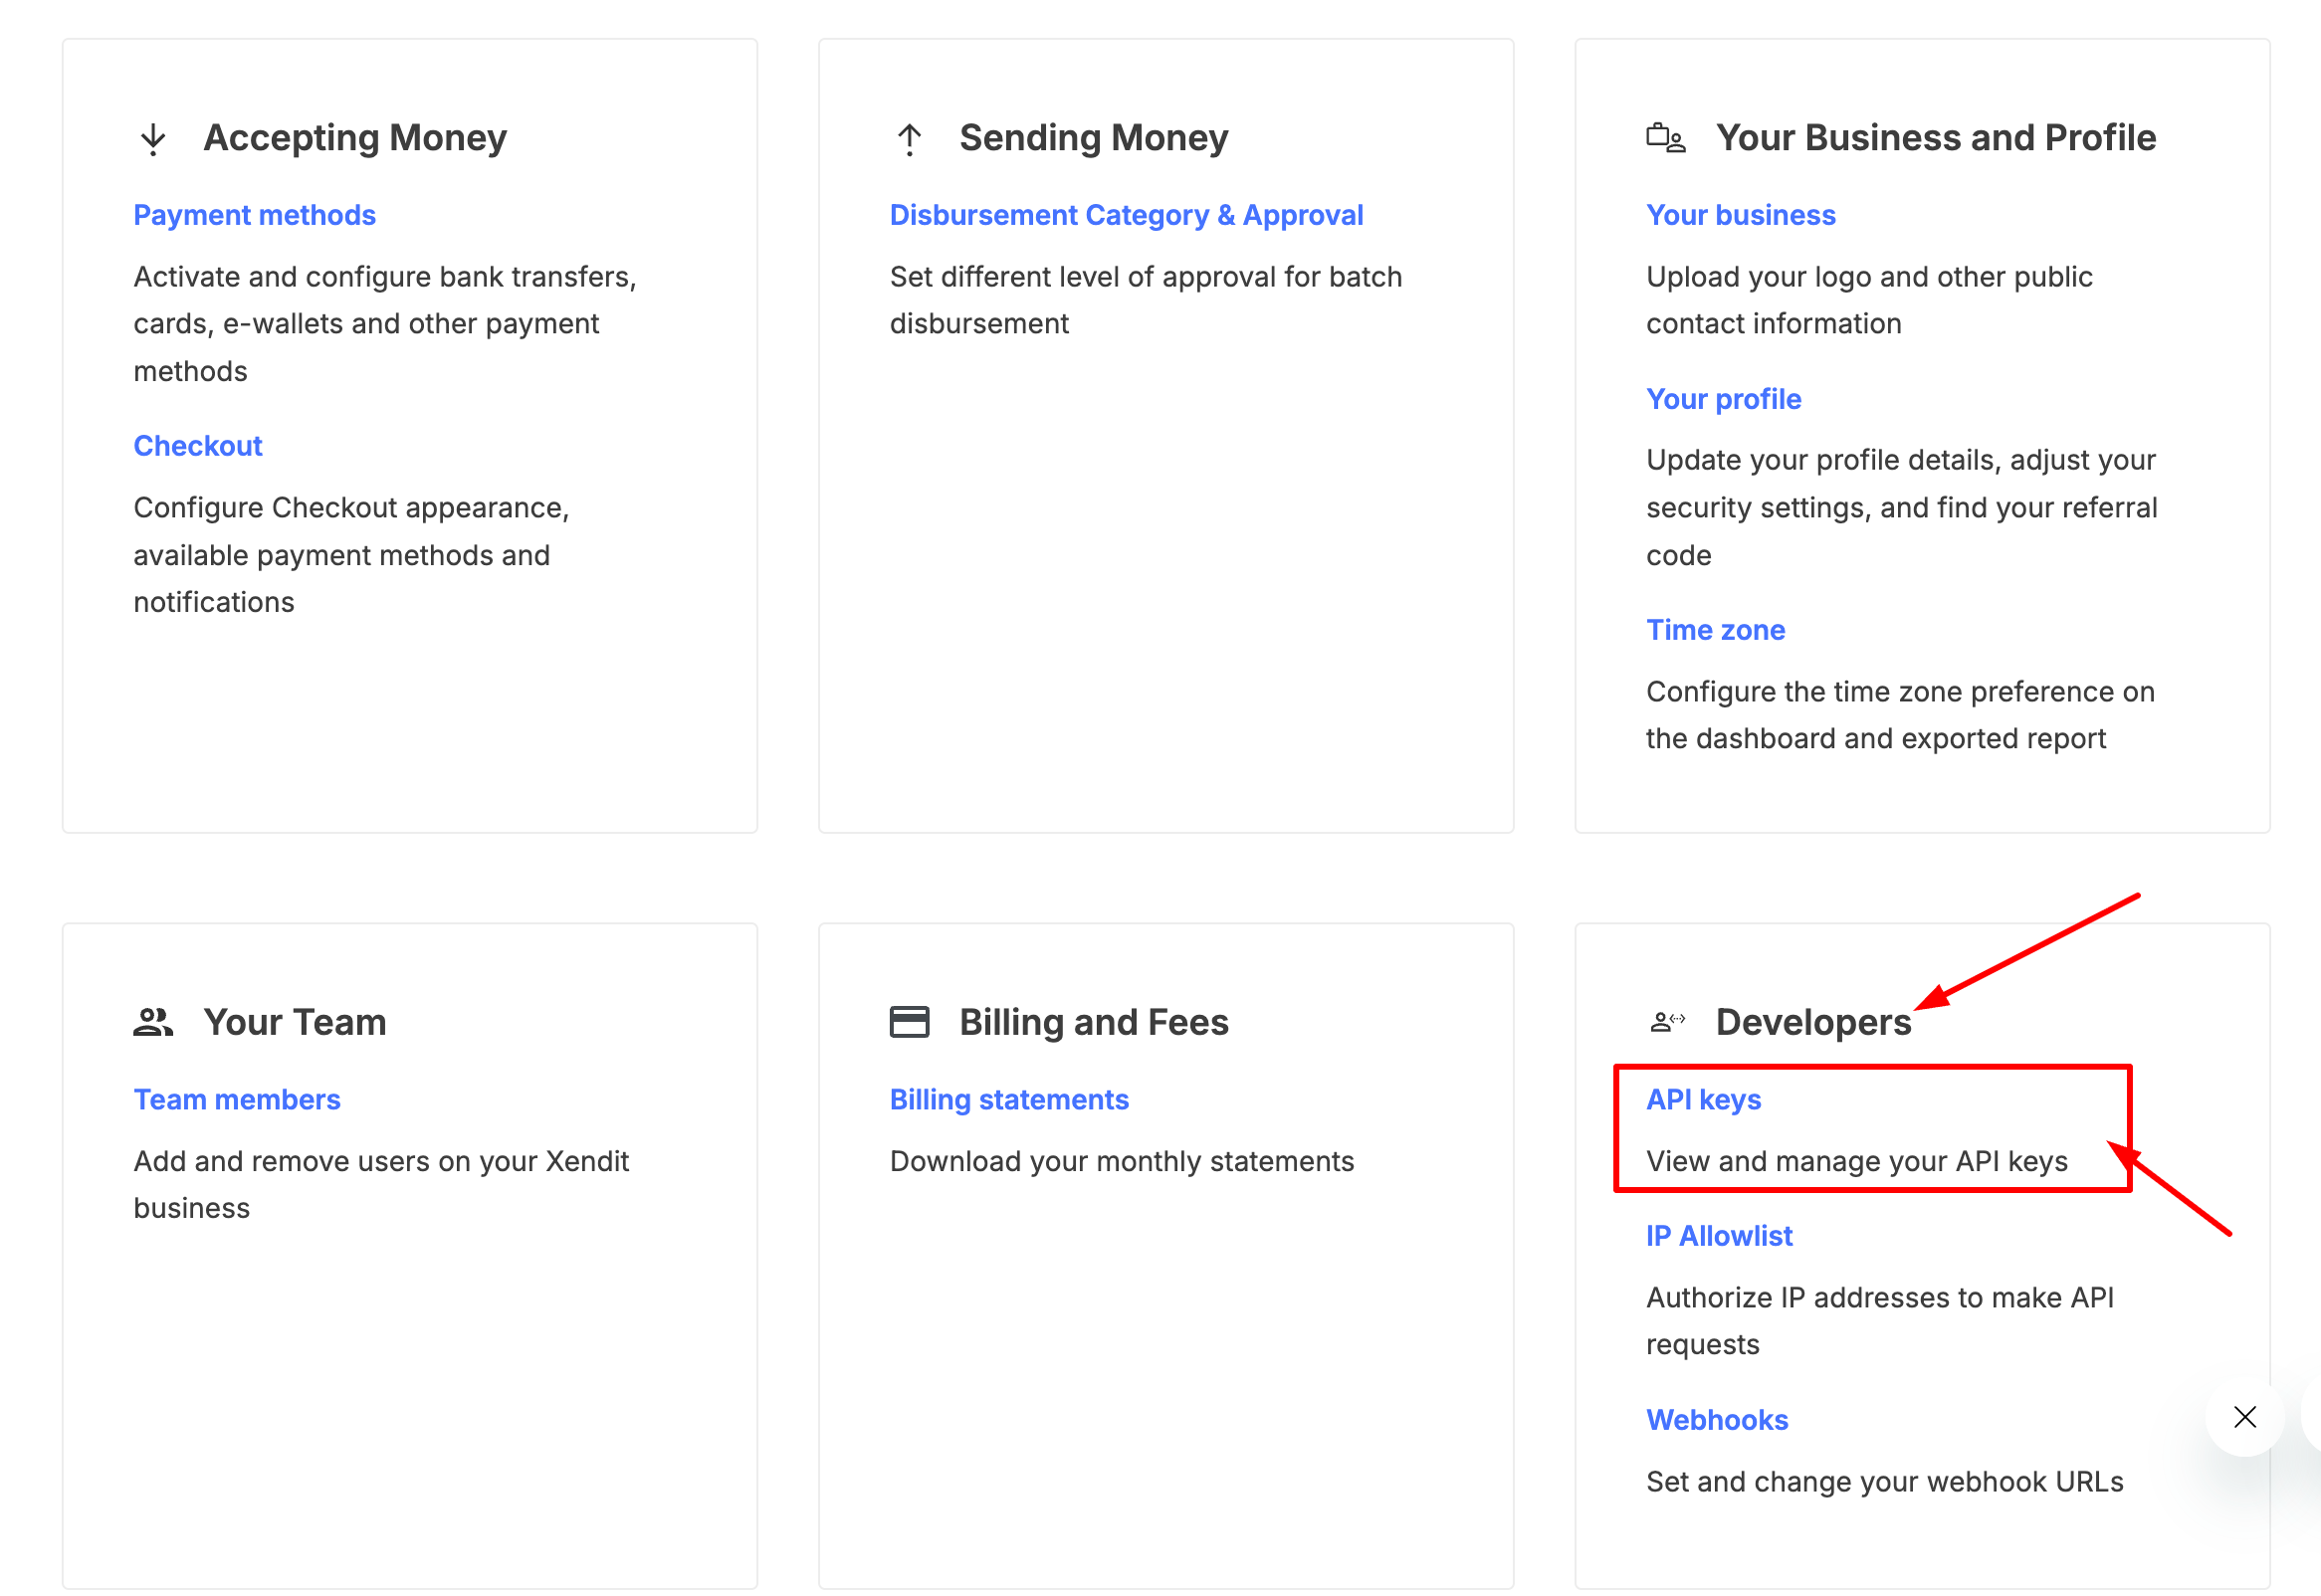
- Select API Keys.
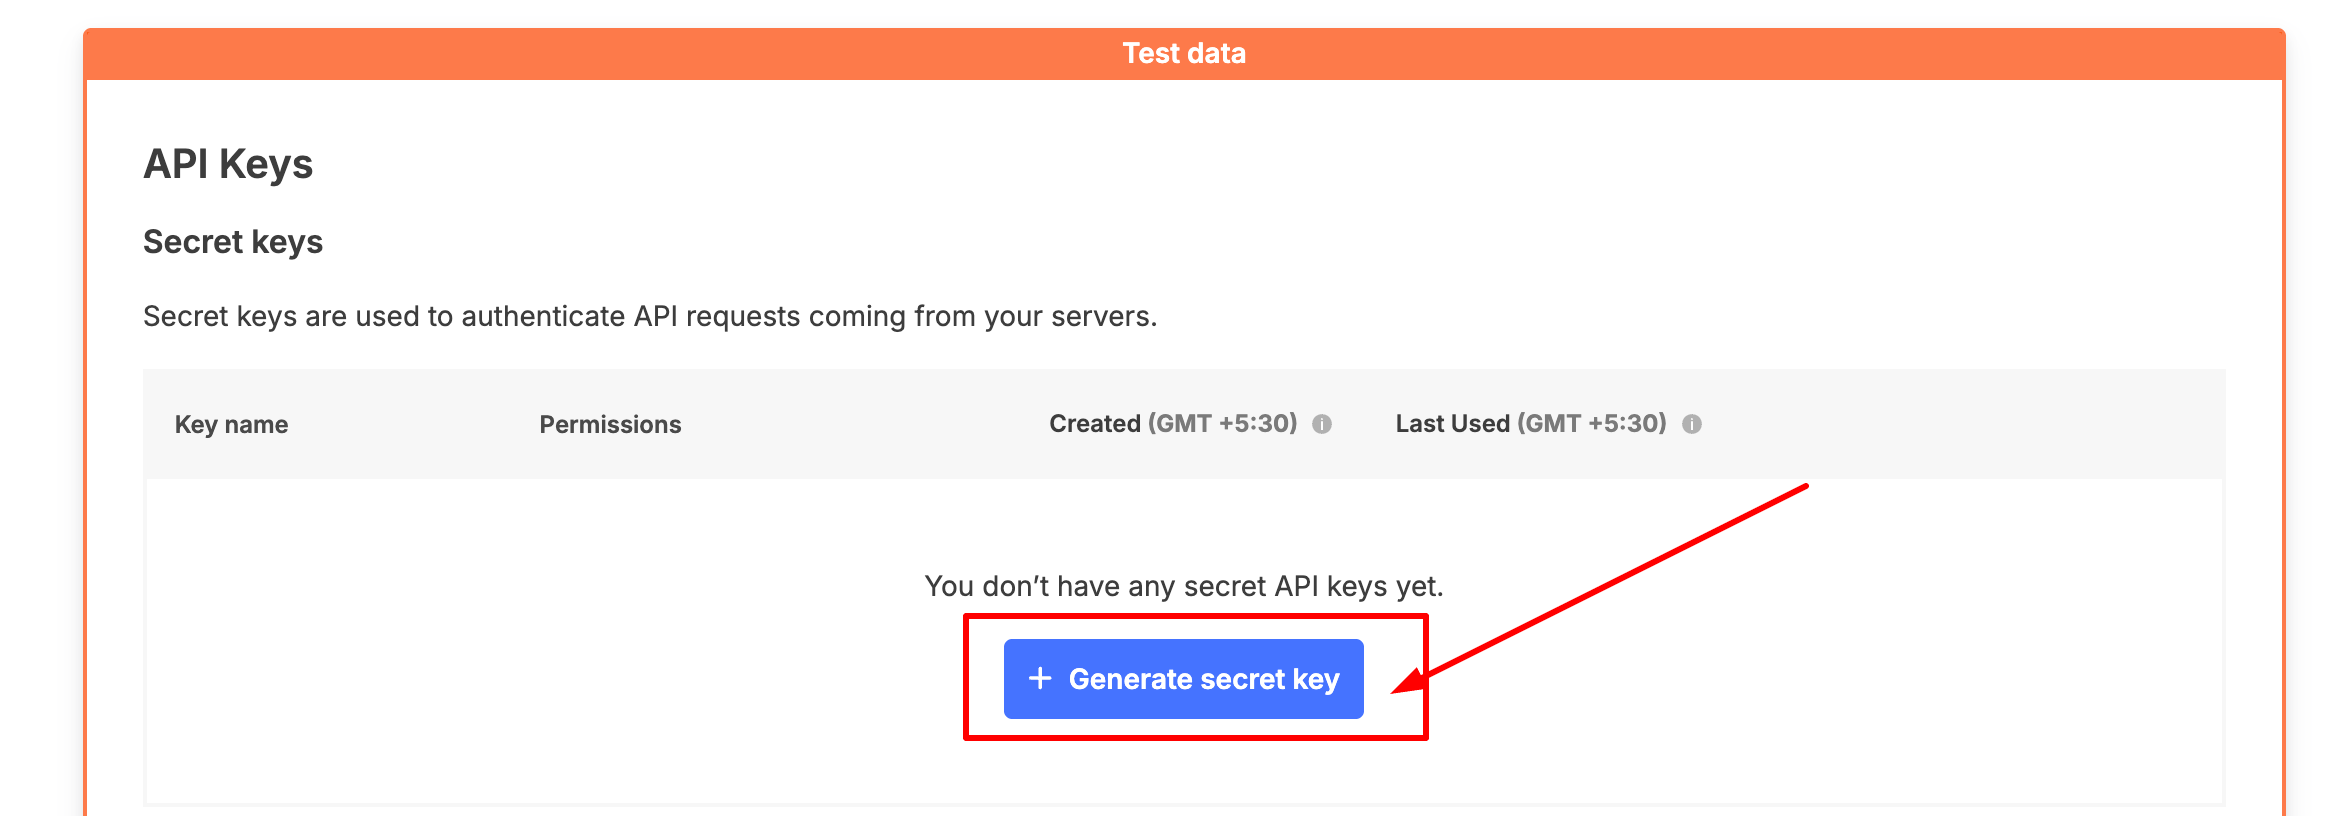
- Generate a new Secret API Key.
- While generating the key, enable the following permissions:
- Money-in
- Money-out
- Copy both your Secret API Key and Public Key.
Step 3: Connect Xendit with FlexiFunnels
- Log in to your FlexiFunnels account.
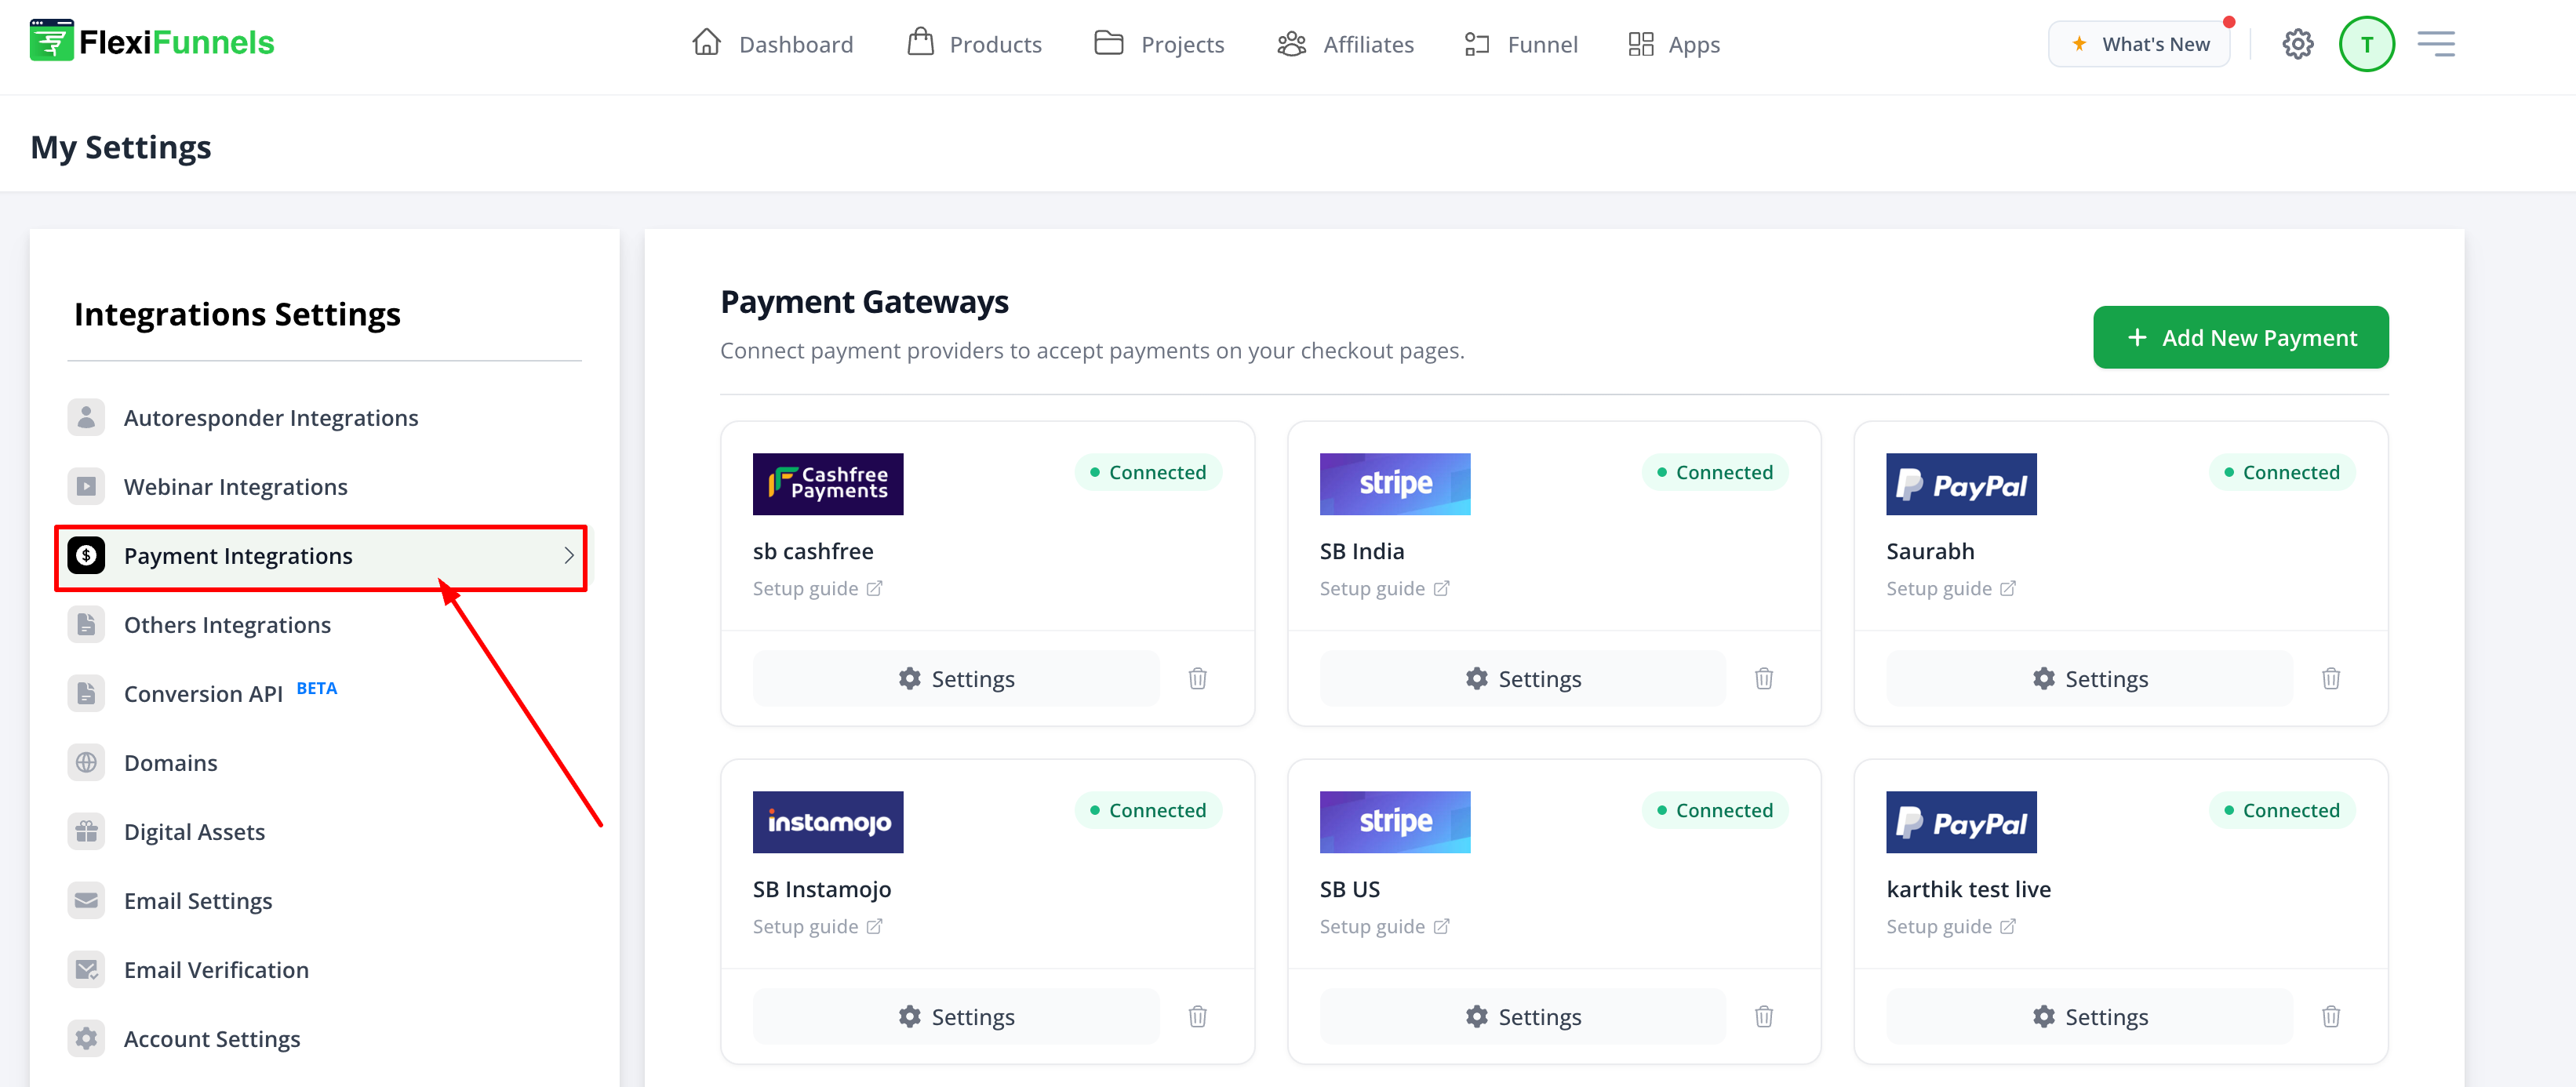
- Open Settings.

- Navigate to Payment Integrations.
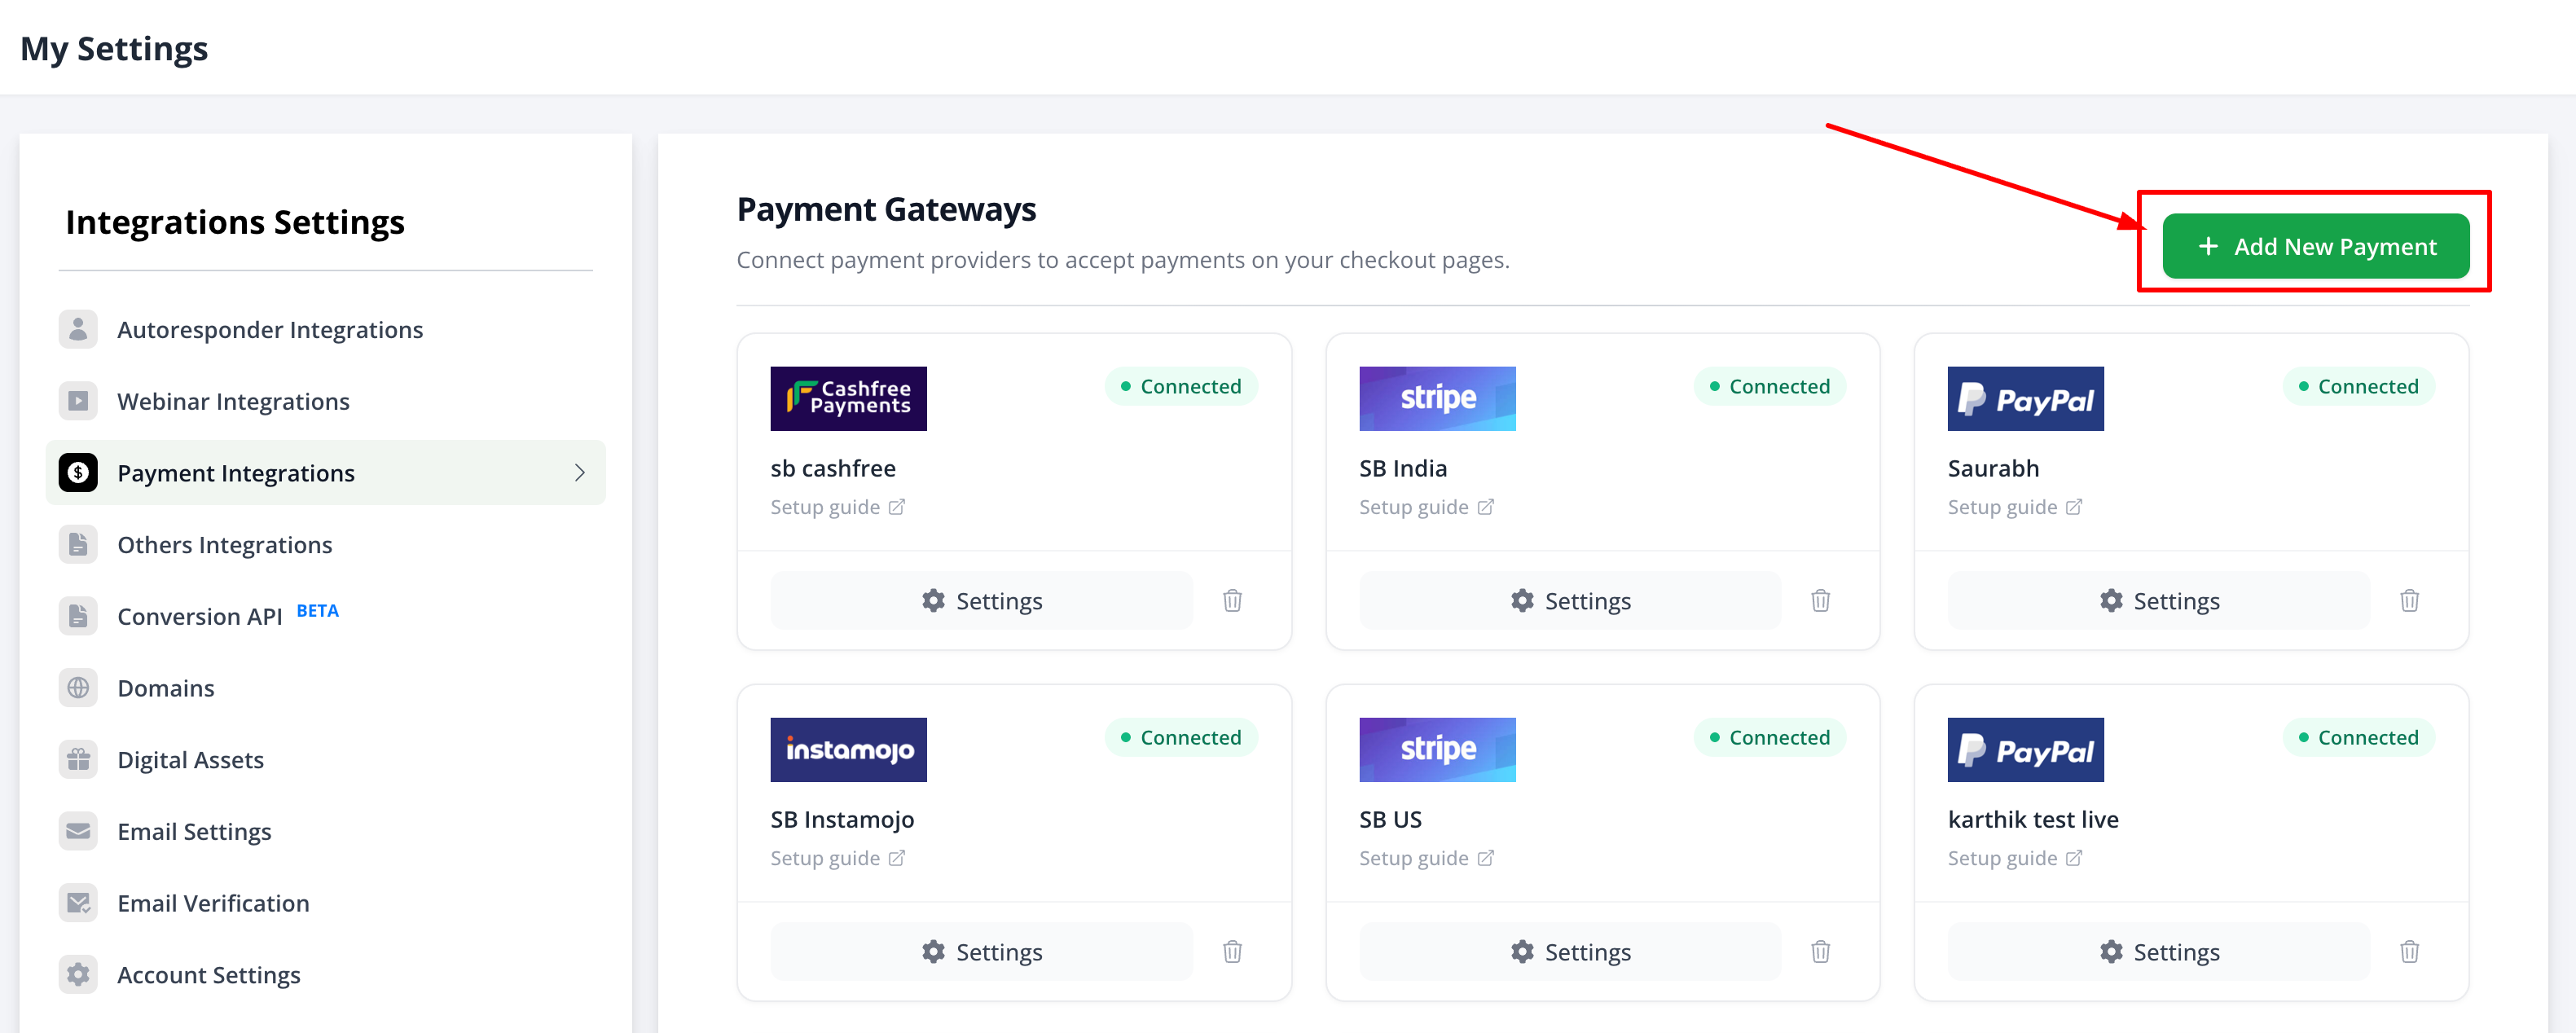
- Click Add New Payment Gateway.
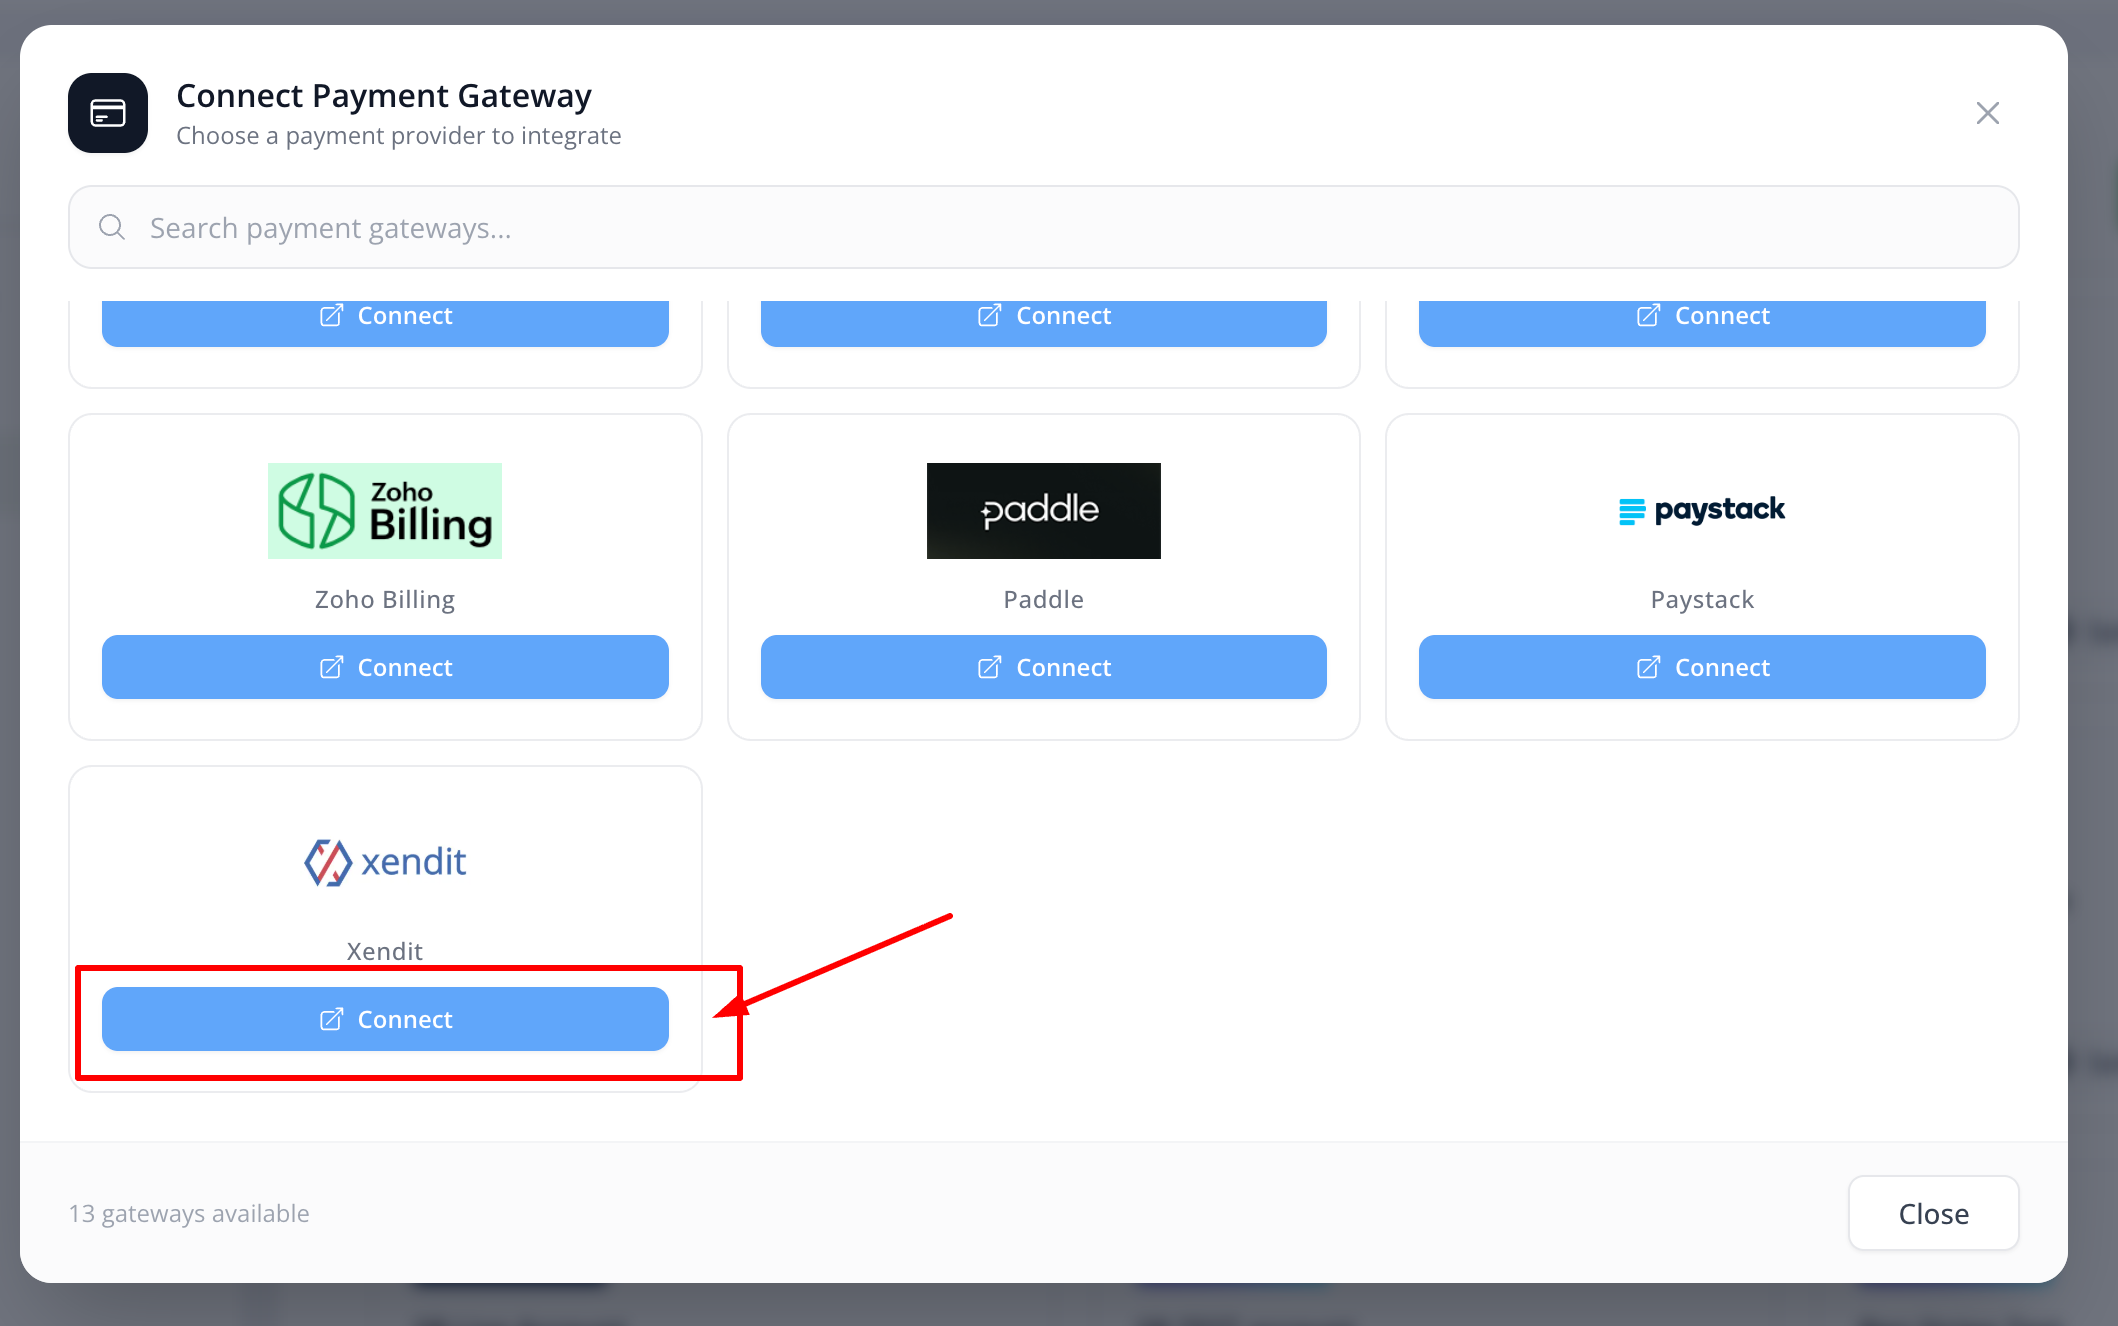
- Select Xendit and click Connect.
Step 4: Add Your API Credentials
Complete the payment gateway configuration by entering the required information.
- Account Name – Enter any name for internal identification.
- Secret Key – Paste the Secret API Key copied from Xendit.
- Public Key – Paste the Public Key, if required.
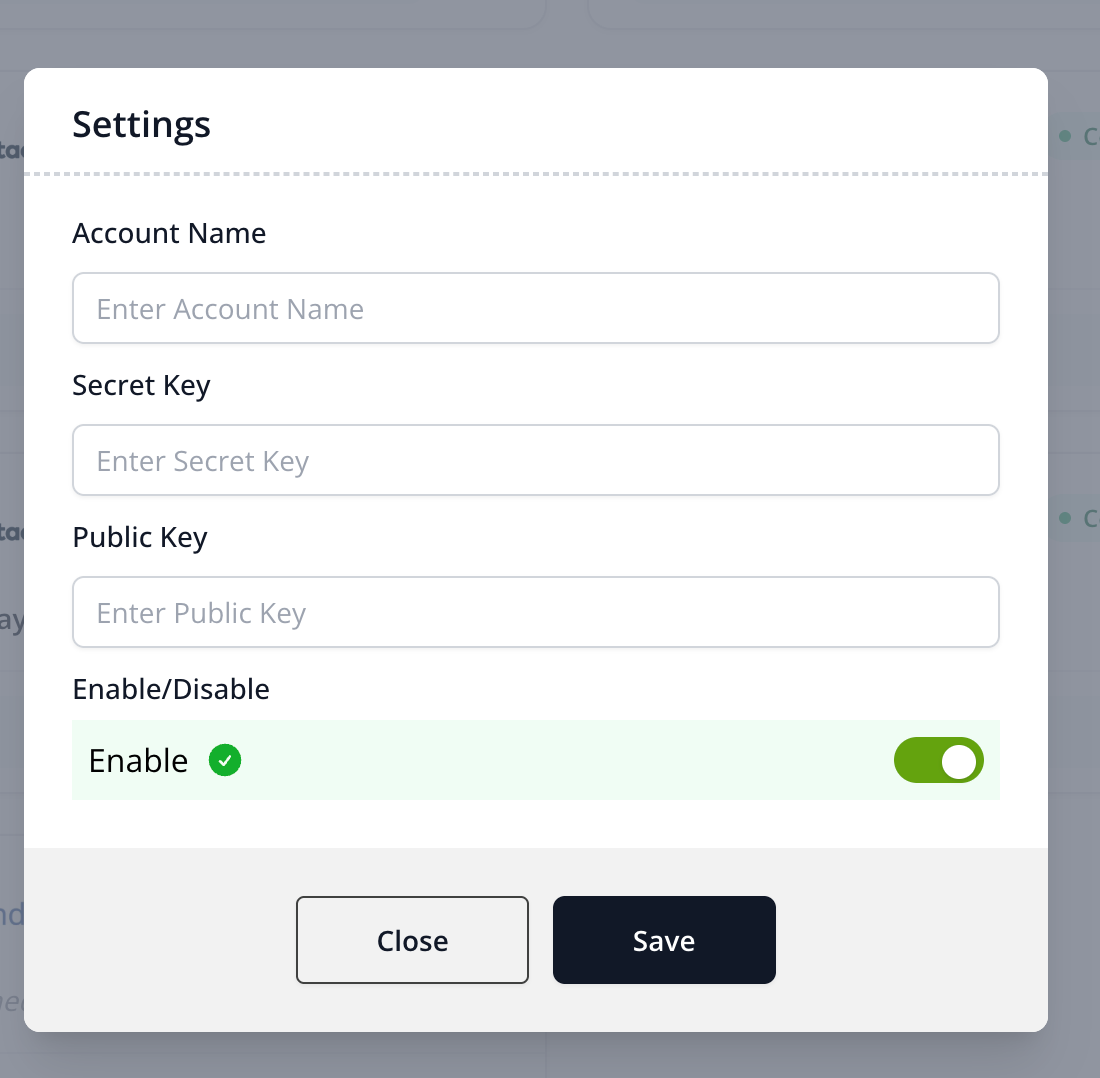
Click Enable to complete the integration.
Step 5: Verify the Integration
Before accepting live payments, perform a test transaction to ensure everything is working correctly.
- Create a test product in FlexiFunnels.
- Ensure your product currency matches your Xendit account currency.
- Verify the payment amount is above Xendit's minimum transaction limit.
- Complete a test purchase.
- Confirm the payment appears in your Xendit Dashboard.
- Verify the order is created successfully inside FlexiFunnels.
Minimum Transaction Amounts
| Country | Currency | Minimum Amount |
|---|---|---|
| Indonesia | IDR | 10,000 |
| Philippines | PHP | 100 |
| Malaysia | MYR | 5 |
| Thailand | THB | 20 |
| Vietnam | VND | 20,000 |
Common Scenarios
Payments are Failing
- Verify your product currency matches your Xendit account currency.
- Ensure the payment amount is above the minimum transaction limit.
- Confirm you are using the correct API credentials.
Unable to Connect Xendit
- Verify the Secret API Key has been copied correctly.
- Ensure the API Key has Money-in and Money-out permissions enabled.
- Reconnect the payment gateway after updating your credentials.
Best Practices
- Choose the correct country and currency during account registration.
- Test your payment flow before accepting live payments.
- Store your Secret API Key securely.
- Verify your currency configuration before publishing checkout pages.
Before Contacting Support
- Verify your API credentials.
- Confirm your Xendit account currency.
- Ensure your FlexiFunnels product uses the same currency.
- Share screenshots of any payment or integration errors.
- Provide the checkout page URL.
Expected Outcome
After completing the integration successfully, Xendit will appear as Connected inside your FlexiFunnels Payment Integrations. Customers will be able to complete payments through your checkout pages, and successful transactions will be recorded in both Xendit and FlexiFunnels.
Additional Resources
For more information about Xendit's supported payment methods, payment channels, and transaction limits, refer to the official Xendit documentation:
Was this article helpful?
That’s Great!
Thank you for your feedback
Sorry! We couldn't be helpful
Thank you for your feedback
Feedback sent
We appreciate your effort and will try to fix the article