Part 1- Create Necessary Pages
First, log in to Your Flexifunnels Account.
Click on Project Settings from the dashboard.

Then, kindly create 3 Necessary Pages
=> Sales page
=> Checkout page
=> Thankyou page

Part 2- Create Product
Click on Product Settings from the dashboard
Click on the "Add New Product" button to add a new product.
Select the Category Of your product.
After Selecting Your Product Category.
You can create a new product by completing all the 6 settings mentioned above.
General Settings
Price
Payment Options
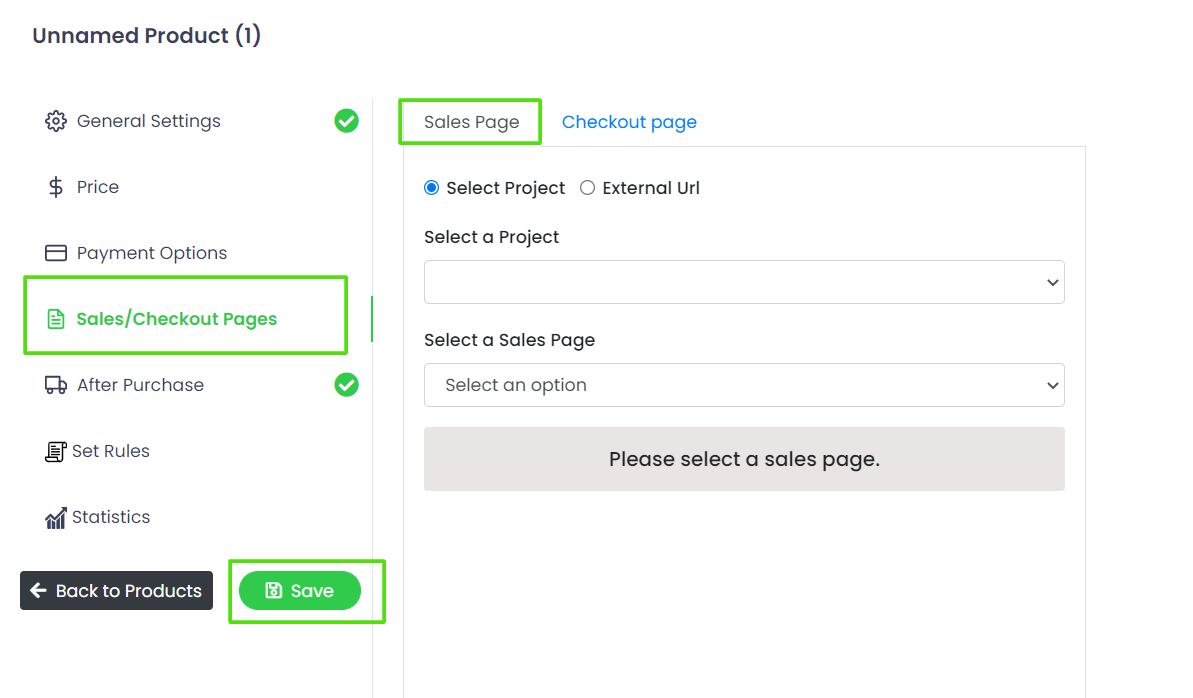
Sales Page/Checkout Pages
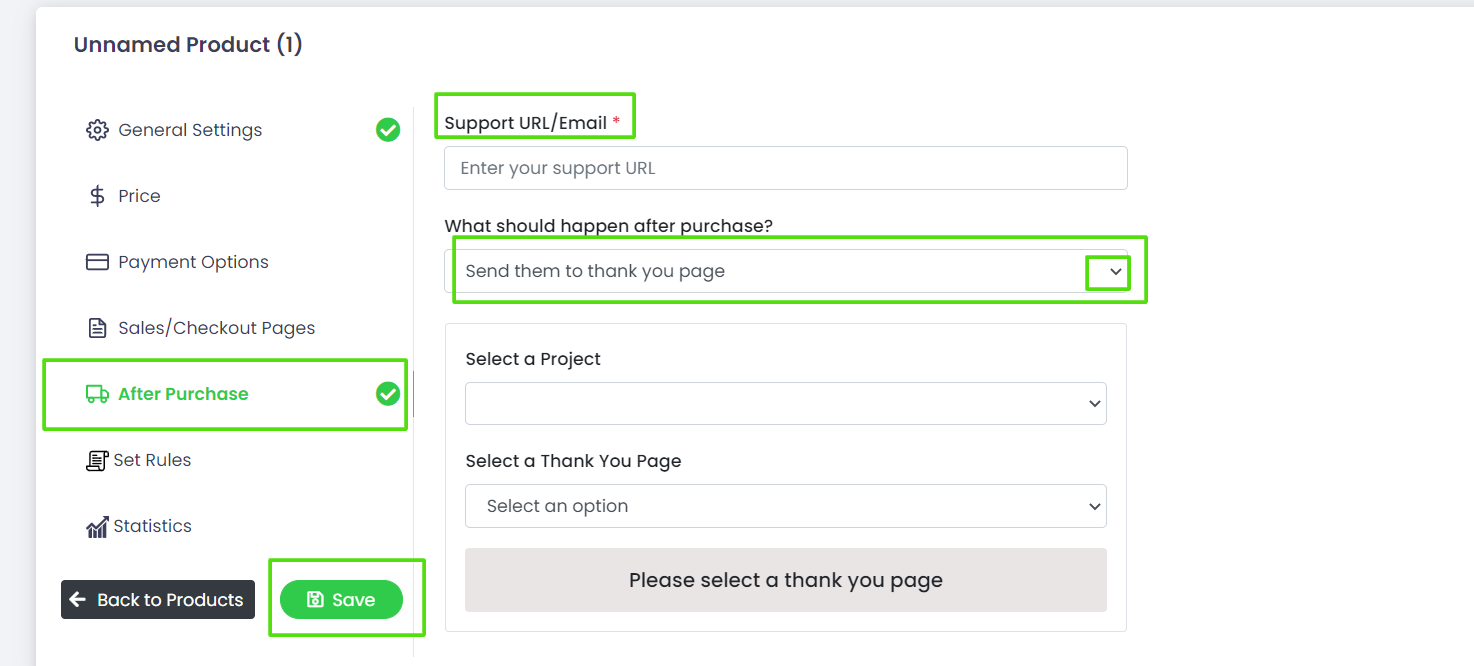
After Purchase
Set Rules
Bump
Statistics
Let us Discuss This Step by step
General Settings
Name your Product as the Product Title.
Give a Brief Description of the Product.
To upload a product logo, Click upload from the right-hand side.

Product Status - One can change the product status from these options
Live - To make the Product Live.
Price
To set a Product Price Click on the "Set Product Price" Button.
After Clicking on “Set Product Price” This screen will appear.
Select pricing settings according to your needs and usage of the product.
Select a Payment type -
It can be a one-time fee.
Type the Product price that you have decided on.
PAYMENT OPTIONS
Click on add Payment provider for this project,
Select the available payment providers And click on the Disconnect button to Connect Your Payment Provider.
If you have not connected any payment providers in the settings tab, you will need to add a payment provider in order to collect payments.
If you have connected any payment providers then it will show the connected payment providers and you can select which payment providers you want to select for this product by clicking on the Disconnected button.
Sales Page / Checkout Page
SALES PAGE
Select the "project" in which the sales page of the product is available.
Then select the "landing page" from the dropdown and select it as the sales page.
Checkout Page
Select the project in which the Checkout Page of the product is available.
Then select the landing page from the dropdown and select it as the Checkout page.
Click “save” to update the changes.
After Purchase
Support URL/Email - Enter Support URL or Email Id.
What should happen after purchase?
Set the conditions after the purchase of the product.
It can be - Send them to thank you Page, Add them to a Membership Site, etc.
Each set is done on “What should happen after purchase?” and will have different settings.
Send them to a Thank You Page - Send them to a Thank You page of a Project.
-Select the project in which the Thankyou Page of the product is available
-Then select the landing page (Thankyou Page) from the dropdown and select it as Thankyou Page.
Add them to my membership Site
After the purchase of any product, by using this setting, one can directly add them to their membership site and send access immediately.
One has to select bundles, made in the pricing settings of the membership project.
Set Rules
One can set their own custom rules, by using the Custom Rules settings.
Click on the “Set Product rules” button to set a new rule for your product.
After clicking on the “Set Product rules” button, this screen will be seen.
When - Set when the condition should be, in which the rule should be triggered.
Product is purchased - Set rules when a product is purchased.
Bump id purchased - Set rules when a Bump is purchased.
For all pricing options - for all pricing options set in the selected product
For a specific pricing option - Select the specific price on which the rule should be triggered.
Use - Here all the autoresponders connected with flexifunnels in the integration settings will be displayed. Data of the buyer set in order form fields in the checkout page will be passed to the selected autoresponder.
Add them to - Add them to is an option that can be used to add someone to the specific list in the autoresponder selected in the User settings of set rules.
This list - select the list, where the data should be sent.
Autoresponder Tags - assign a tag to the data from this field option.
Click on “save” to set the rules.
Bump
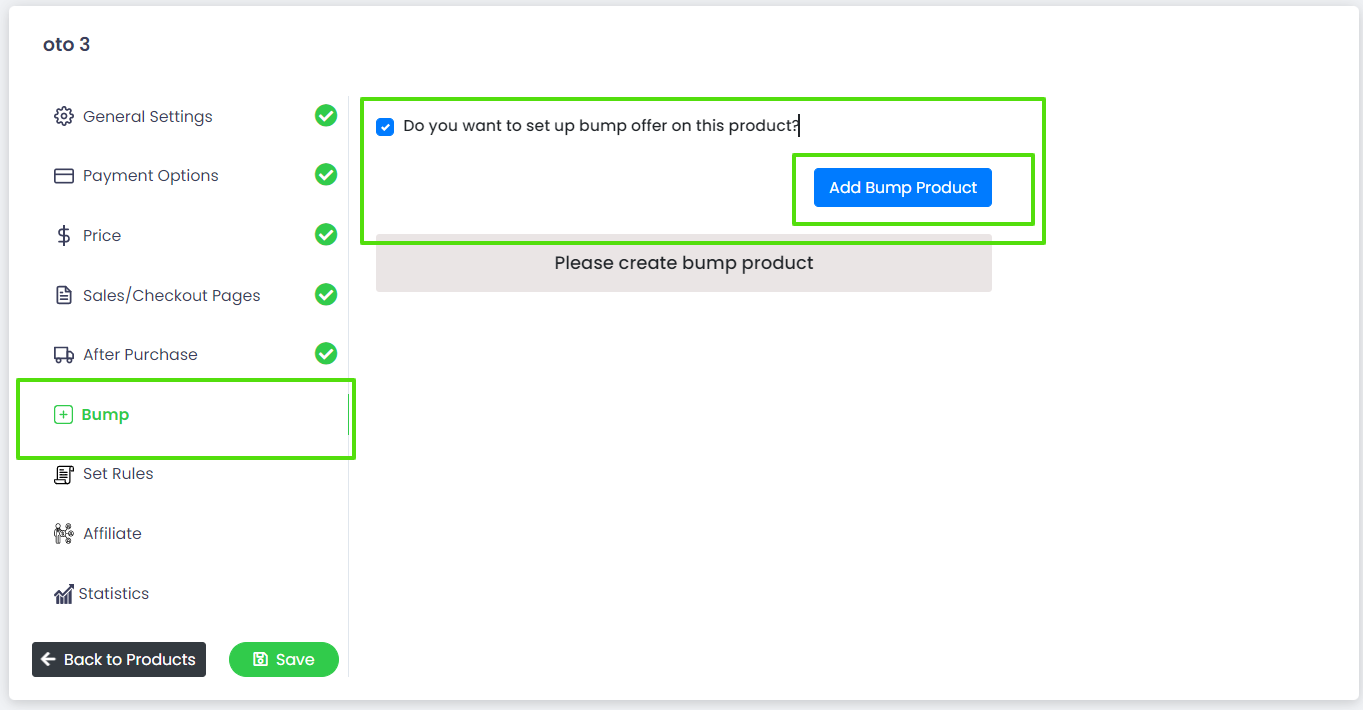
Tick the checkbox and click on the "ADD Bump Product" button to add a bump on the checkout page.
On clicking the button, the Bump settings will open up.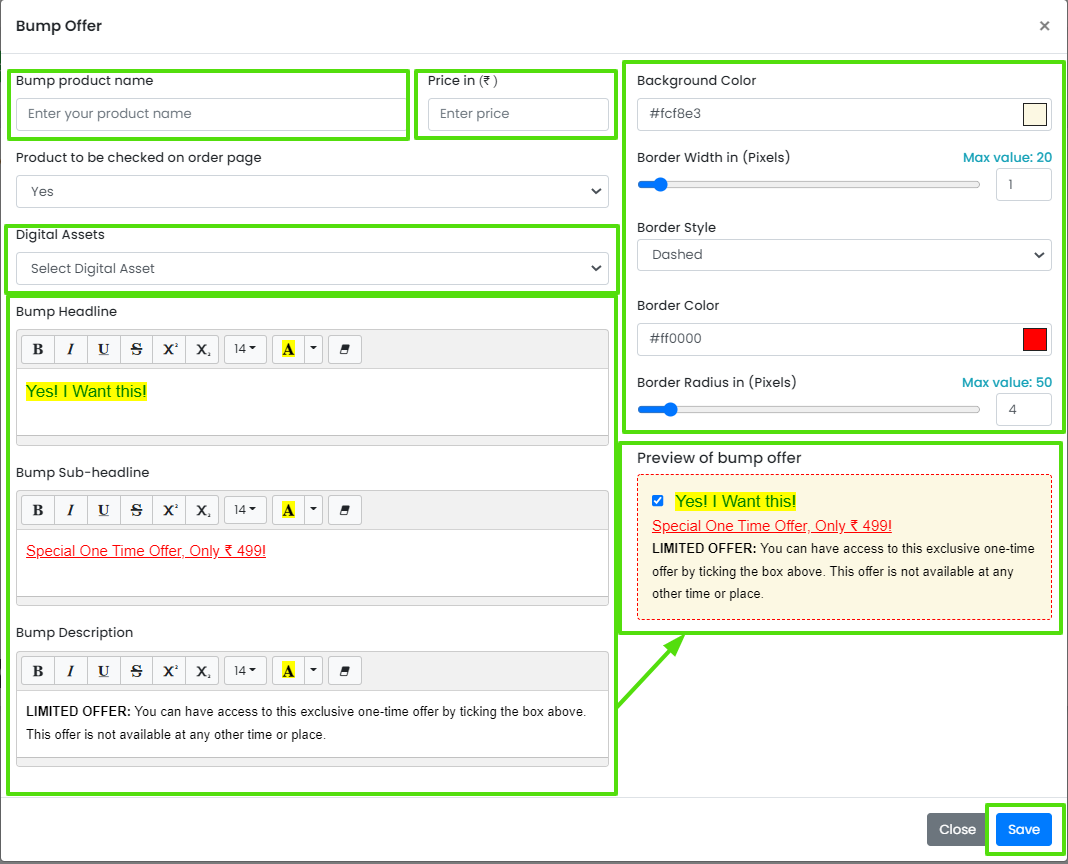
Tick the checkbox and click on the "ADD Bump Product" button to add a bump to the checkout page.
Bump Product Name: Name your Bump product using this setting.
Price: Set a price for your bump using this setting.
The product to be checked on the order page: If this is selected as "Yes", then the bump will be by default selected on the checkout page. Select "NO" if you don't want it to be checked by default on the checkout page.
Digital Assets: Deliver digital assets on purchase on this bump. A digital asset will be delivered only if it is added to a specific bump and that bump is purchased.
Bump Headline, Bump Sub Headline, Bump Description, Background Color, Border Width, Border Style, Border Color, Border Radius: These are the style settings of the bump, you can edit the bump according to your preference.
preview of the bump offer: will be shown inside the preview of the bump offer preview window.
P.S. - The bump displayed in the preview will be displayed in the selected checkout page dynamically if the bump is added to a product from the bump settings in the product.
An example of the bump product on the checkout page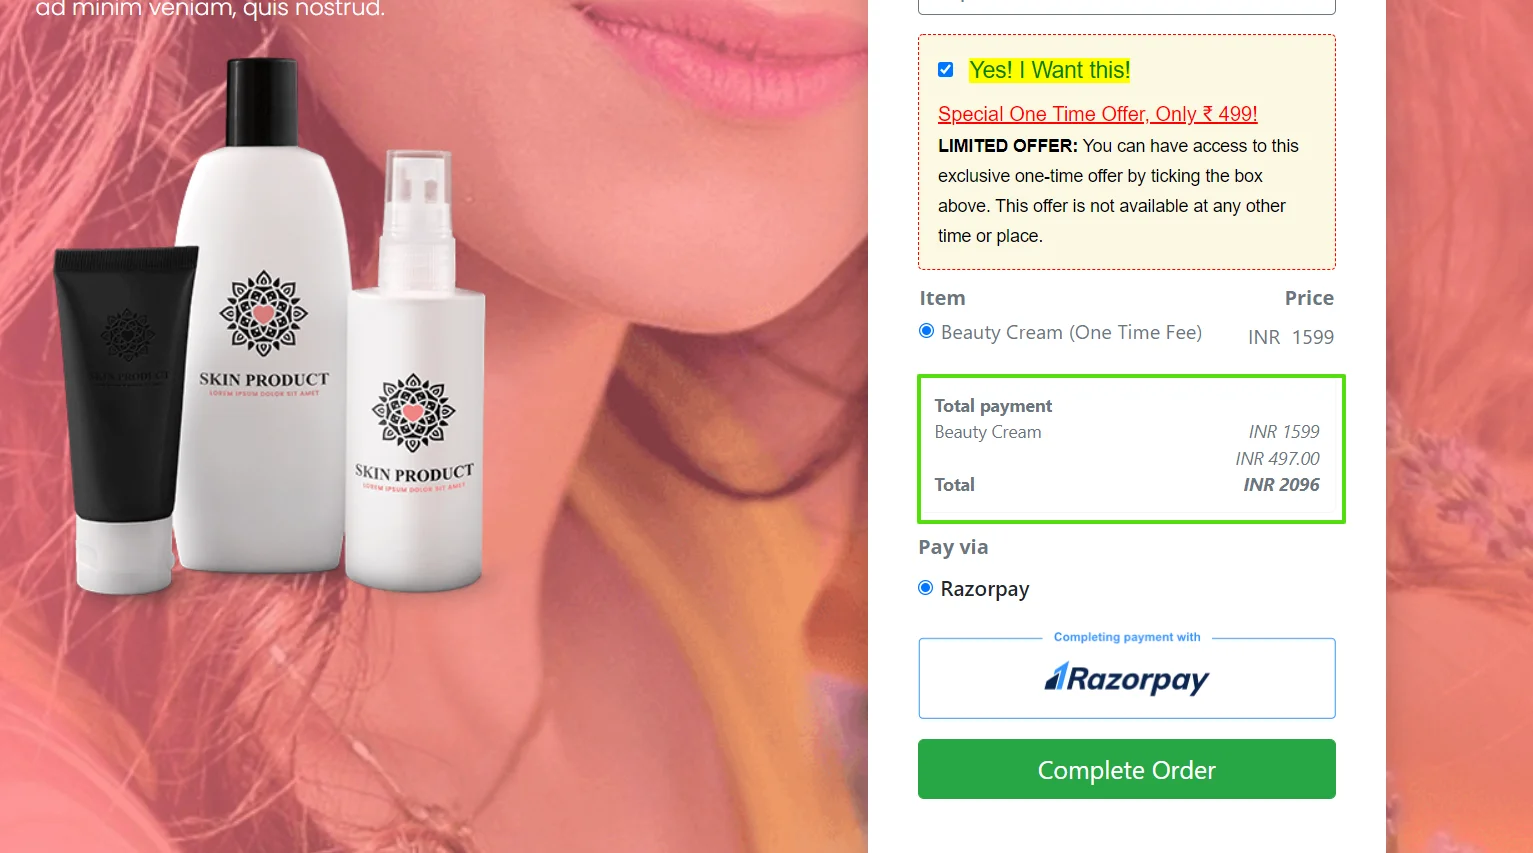
Statistics
Here all the collected data of the product from the checkout page will be displayed dynamically with the payment status
Part 3- Create Digital asset and Connect with Product to sell as an Ebook
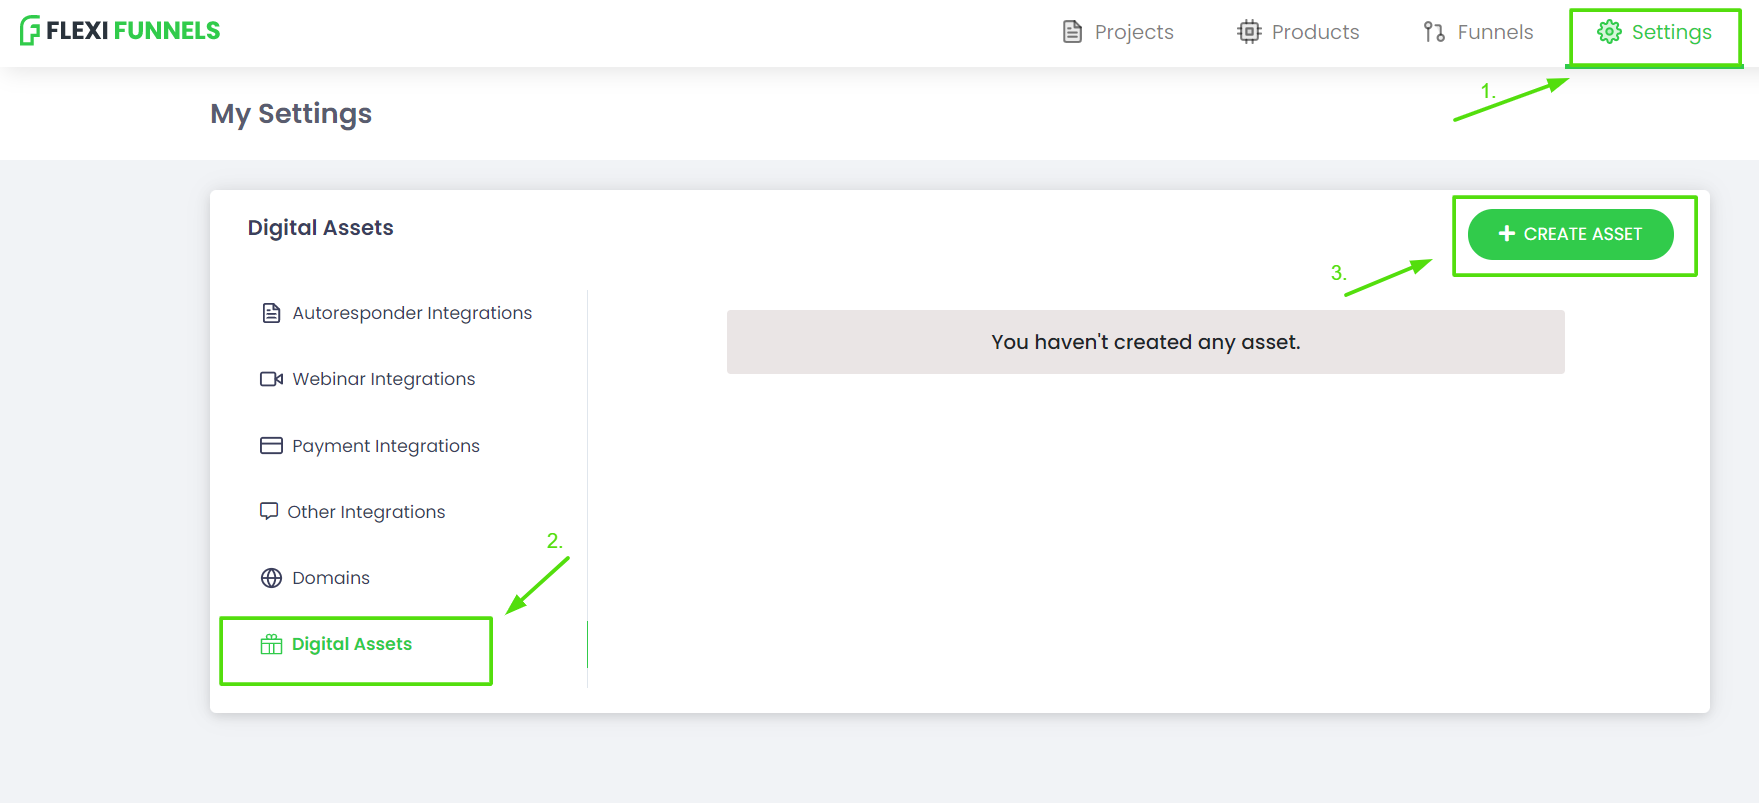
Click on the Settings tab from the dashboard, then Click on Digital Assets from the left-hand menu and click on
"+CREATE ASSET " button to create an asset.
After clicking the "+CREATE ASSET " button, the popup will be displayed, where you can upload and create a digital asset.
 Upload Asset File - Upload a file from your device to the FlexiFunnels server, by clicking on the "choose file" button and uploading the digital asset.
Asset Name - Give the Uploaded asset a name.
Sender Name - Give a Sender Name, by which the email will be delivered to the subscribed users of your digital asset.
Sender Email- Give an organisational mail from which email will be delivered.
Email Subject - You can set the Email subject Line by using this option.
Email Content - One can edit the email content to be displayed when a subscriber of the digital asset receives an email.
NOTE: Sender Name, Sender Email, Email Subject, Email content, will be only used if you deliver your digital asset using the email method.
After uploading this screen will be displayed.
Copy Path - Copy the cloud URL / path of the digital asset uploaded to the FlexiFunnels.
Download - Open the cloud URL / path of the digital asset uploaded to the FlexiFunnels.
Edit - Edit the selected digital asset uploaded to the FlexiFunnels.
By using this setting, whoever purchases the product where the digital asset is configured will recieve the digital asset on their email.
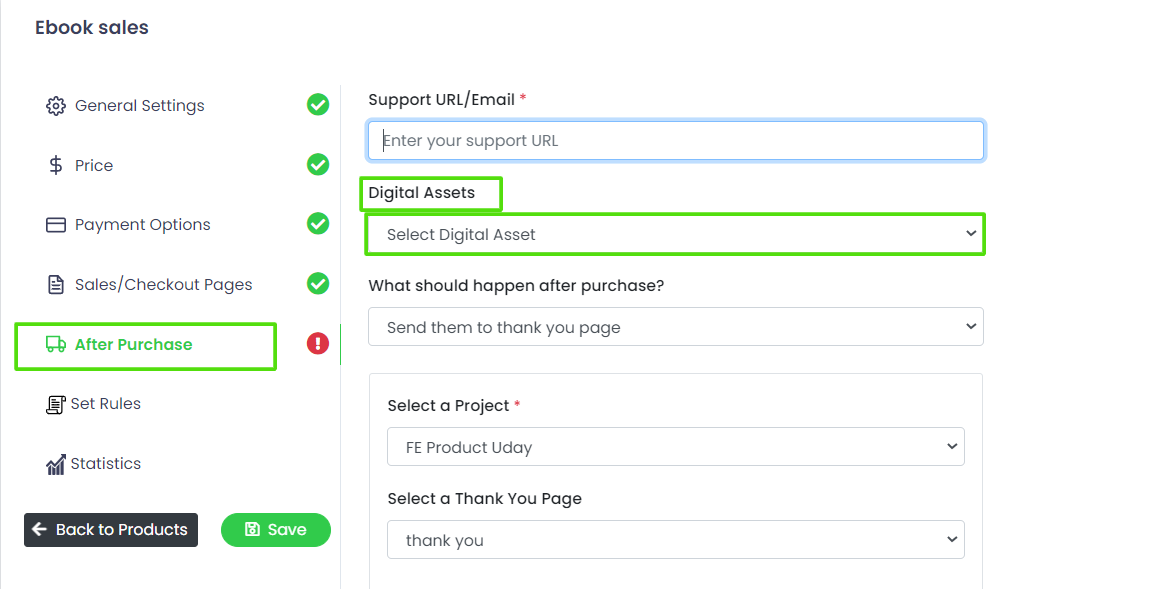
To connect Digital Asset with Product,
Simply go to the After purchase step of product creation and Select the Digital Asset from the dropdown.
Was this article helpful?
That’s Great!
Thank you for your feedback
Sorry! We couldn't be helpful
Thank you for your feedback
Feedback sent
We appreciate your effort and will try to fix the article


